
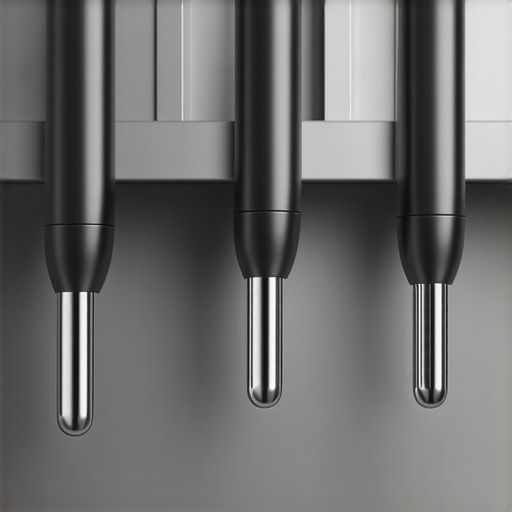
3 Pro-Level Steam Wands That Fit Under Low 2026 Cabinets
I remember the moment vividly—staring at my cramped kitchen space, eyes glued to the towering stack of mugs on the counter, while my latest attempt at a creamy microfoam resembled more of a frothy mess than the luscious texture I craved. It was an eye-opener—my beloved milk frother, designed for professional baristas, just wouldn’t fit under the low-hanging cabinets above my espresso machine. Frustration set in as I realized that my dreams of perfect cappuccinos and latte art were limited not by my skills, but by a simple, overlooked obstacle: the height of my steam wand.
Why Finding the Right Steam Wand Matters More Than You Think
If you’re like me, you might have a top-tier espresso machine and a passion for barista-worthy drinks, but cramped kitchen spaces can quickly turn your coffee dreams into frustration. The truth is, many professional-style steam wands are too tall to operate comfortably beneath low-lying cabinets—an issue that can lead to uneven steaming, splattering milk, or even damaging your equipment. Trust me, I made the mistake early on of trying to force a standard wand into my tight space, which resulted in burnt milk and a cracked pitcher—avoidable mishaps that anyone can learn from. As highlighted by the experts, using the right equipment tailored to your setup kickstarts your journey toward that silky, glossy microfoam we all desire.
So, what can you do if your workspace is limited? The good news is, there are pro-level steam wands specifically designed to fit under low cabinets—small but mighty, offering all the control and steam power you need without compromising your small footprint. Today, I’ll guide you through selecting the best options, share my personal experience, and help you avoid the pitfalls I faced. Ready to transform your coffee game without remodeling your kitchen? Let’s dive in.
Is a Pro-Level Steam Wand Actually Worth the Hype?
It’s natural to question whether investing in specialized equipment makes a real difference or if it’s just marketing hype. Early in my journey, I assumed that a budget-friendly, standard wand would suffice. But after a few failed attempts at microfoam that looked more like cloudy milk than polished latte art, I realized that quality and design matter—especially when space is tight. A well-designed, compact steam wand not only saves space but also provides consistent steam pressure, reduces splattering, and enhances your overall barista skills. If you’re curious about the best options that truly deliver, I recommend checking out the top-rated models benchmarked for 2026, which prioritize performance and compactness. Curious about specific features? I’ve compiled reviews of the best small-space steamers that can help you achieve cafe-quality microfoam right in your kitchen.
Prep Your Pitcher and Milk
Begin by choosing the right pitcher—ideally, a stainless steel one with a narrow spout for control. Fill it to just below the spout with fresh, cold milk; cold milk creates better microfoam. As I learned during my first attempt, using warm milk resulted in quick overheating and uneven frothing, so always start cold for consistent results.
Position the Wand and Maintain Stable Hand Control
Insert the steam wand just below the milk surface at a slight angle. Imagine the wand as a gentle spear aimed to create a whirlpool—this action encourages uniform microbubbles. Keep a steady hand, as shaky movements will cause erratic microfoam, leading to a grainy or uneven texture. I found that anchoring my hand against the machine helped steady my pour, improving microfoam quality.
Keep the Milk Moving
Activate the steam and position the wand to introduce a small vortex—think of it as stirring with a tiny spoon. The milk should swirl smoothly in the pitcher, drawing in air at the right moment. When I first tried to rush this step, I ended up with large bubbles instead of velvety microfoam. Patience in establishing the whirlpool yields the smooth texture desired.
Control Steaming Temperature and Texture
Listen for a gentle hissing—overly aggressive steam causes the milk to scorch or create large bubbles. A good rule of thumb: stop steaming once the pitcher heats up to about 140°F (60°C). Use a thermometer if necessary, especially when learning. I initially skipped this, leading to burnt milk and bitter taste, but integrating temperature control made a massive difference.
Finish and Pour with Precision
Once steaming is complete, tap the pitcher on the counter to settle the microbubbles and swirl to integrate the foam seamlessly. This is crucial for perfect latte art—consistency in texture ensures that your designs won’t bleed or distort during pouring. When I poured the foam directly after steaming without this step, my latte art was cloudy and uneven, but taking a moment to swirl improved clarity and form.
Practice Patterning Techniques
Start with simple shapes like a heart or a tulip. Focus on pouring from a height of about 2 inches, then gradually lowering the pitcher to control the flow. Use quick wrist movements to guide the microfoam into patterns. My first few attempts resulted in a muddled design, but practicing steady pours and consistent speed helped me achieve cleaner, more defined art.

Remember, mastering microfoam isn’t about instant perfection—it’s about understanding each step and practicing deliberately. For more advanced tips, check out techniques to elevate your latte art skills and refine your craft.
When it comes to creating that perfect microfoam or painting intricate latte art, many enthusiasts fall prey to misconceptions that hinder their progress. One widespread myth is the idea that a higher-powered steamer always guarantees better foam quality. In reality, mastering your equipment’s nuances—like pressure control and wand positioning—is far more impactful than sheer power. Overlooking these details can lead to flat or uneven microfoam, regardless of the machine’s specs. According to expert baristas, understanding the subtle pressure dynamics and steam wand angles is crucial for consistent results; you can explore advanced techniques to elevate your craft via [this guide](https://milkfrothers.espressotechguide.com/mastering-milk-frother-techniques-elevate-your-latte-art-skills-at-dawn).
Keeping Your Milk Steamer in Top Shape
Investing in quality tools is just the start; regular maintenance is crucial to ensure your milk steamer continues producing silky microfoam and reliable performance. Personally, I rely on a dedicated brush set tailored for steam wand cleaning, which includes narrow, flexible brushes designed specifically for reaching into hard-to-access areas. These brushes help remove milk residues that can clog the wand over time, preventing uneven steaming or overheating. Incorporating a weekly descaling routine with a descaling solution recommended in the professional guide ensures mineral buildup doesn’t impair steam pressure or heat stability. Regularly inspecting the sealing gasket and replacing worn components prevents steam leaks that could compromise microfoam quality.
Tools I Recommend for Consistent Maintenance
For me, a precise digital thermometer isn’t optional; it helps monitor steaming temperatures accurately, ensuring I stay within the optimal range of 140°F (60°C). This prevents scorching or under-heating, both of which ruin microfoam texture. A high-quality pitcher with measurement markings has been invaluable, allowing me to gauge milk volume and consistency easily, thus maintaining consistent pourability for latte art. Additionally, a dedicated cleaning cloth for wiping the wand after each use prevents residual milk from drying and clogging the nozzle—a simple step that extends the lifespan of the equipment. When choosing cleaning solutions, I opt for food-safe descaling and cleaning agents compatible with espresso machine parts, avoiding harsh chemicals that can degrade seals or affect taste.
Future Trends in Maintenance for Milk Frothers
Looking ahead, I believe smart-enabled milk frothers with integrated sensors might become standard, providing real-time feedback on cleanliness, temperature, and pressure. These innovations could reduce the manual effort needed and help maintain optimal microfoam quality effortlessly. As industry standards push towards more durable and self-sufficient equipment, staying updated on the latest maintenance routines and tools becomes essential. For a comprehensive look at advanced maintenance techniques, check out these expert tips.
How do I maintain my milk steamer over time?
Consistent care involves not only regular cleaning and descaling but also inspecting vital components like gaskets and seals monthly. Using the right tools, such as specialized brushes and digital thermometers, helps prevent issues before they develop into costly repairs. Remember, a well-maintained steamer will deliver that perfect microfoam for years, saving you time and money while elevating your coffee craftsmanship. For detailed step-by-step routines, reach out through our contact page.
The Hardest Lesson I Learned About Milk Steaming in Tight Spots
One of my most revealing insights was realizing that high-quality microfoam isn’t just about the wand’s power but how intimately you understand its quirks—especially in confined kitchen spaces. I used to believe that bigger, more powerful steamers automatically produced better foam, but I learned that mastering the wand’s pressure, angle, and timing is crucial when working within limited space. This turned my approach from a rush to a mindful, deliberate craft that yields silky microfoam every time.
Hidden Challenges No One Tells You About
Initially, I struggled with inconsistent microfoam because I overlooked the importance of maintaining the right wand depth and consistent airflow. It’s tempting to focus on the milk or pour technique, but I found that small adjustments—like keeping the wand just below the milk surface or ensuring a steady hand—made a dramatic difference. Recognizing these nuanced details transformed my every cappuccino into a work of art, reaffirming that skill and equipment must work in harmony, especially with space constraints.
Why I Now Prioritize Compactness Without Sacrificing Quality
After experimenting with various portable and compact steaming options, I discovered that some models, despite their size, deliver professional-grade microfoam. Investing in a steamer designed with low-profile operation in mind allowed me to maintain my passion without needing a kitchen renovation. My advice? Look beyond size and focus on how the wand’s design and your technique complement each other to unlock microfoam mastery in small spaces.
Curated Tools That Elevate My Microfoam Game
I rely on a few trusted items that complement my small-steamer setup. The temperature control pitcher helps me monitor heat precisely, preventing scalding and ensuring consistent microfoam. My go-to small-space steamers have been benchmarked for quality in 2026 and continue to impress. Additionally, a reliable handheld frother offers quick touch-ups if microfoam needs a boost. These tools empower me to work confidently within limited room, proving that smart equipment choice surpasses sheer size.
Push Your Boundaries: What Could You Achieve with a Low-Profile Steamer?
Believing that microfoam perfection is out of reach in small kitchens was a misconception I had to bust. Today, I encourage you to experiment with compact steamers and refine your technique—think of it as a form of intimate mastery. The connection between your wand’s positioning, milk temperature, and your pouring finesse determines whether your microfoam sings or sinks. Take the leap, experiment with new equipment, and watch your skills soar. What unique challenges have you faced working in tight spaces, and how did you overcome them? Share your experience below, and let’s grow together in this craft.