
How to Achieve Flawless Microfoam with Milk Steamer & Frother Tips
Ever fingered your coffee art and felt that pang of disappointment when your microfoam turns out flat, bubbly, or just plain forgettable? I know that feeling all too well. There was a morning not too long ago when I eagerly set out to craft a perfect latte art, only for my milk to refuse cooperation. The foam was dense, the milk was lukewarm, and my perfect design vanished faster than I could fix it. It was a lightbulb moment for me—that I wasn’t alone in this struggle and that mastering microfoam isn’t just about fancy equipment but about technique, patience, and understanding how to get the most from my milk steamer and frother.
Why Achieving Perfect Microfoam Changes Your Coffee Game
Getting that silky, velvety microfoam can seem like magic—yet it’s well within your reach. Microfoam isn’t just about making your coffee look pretty; it transforms the entire flavor experience. A well-made microfoam enhances sweetness, adds a creamy mouthfeel, and sets the stage for stunning latte art. Believe it or not, baristas spend years honing their microfoam skills, but you can learn the essentials in a fraction of that time. If you’ve ever wondered why some coffees look and taste so much better, the secret often lies in how well the milk is steamed.
But here’s the catch—mistakes are common. I used to think heating milk was enough. I’d steam it until it was hot enough, pour, and hope for the best. The result? Bubbles, foam that clung to the pitcher, or worse—scalded milk that lost its sweetness. Early on, I made the mistake of rushing the process or not paying attention to the milk temperature. These are rookie errors that can sabotage your efforts.
According to research from the Specialty Coffee Association, consistent machine technique accounts for a significant portion of the quality of milk foam. This isn’t rocket science—it’s straightforward but requires practice and understanding. And that’s where I want to help you. In the next sections, I’ll walk you through the step-by-step process I’ve perfected, drawing from my experience and trusted industry tips.
Have you ever faced the frustration of pouring a beautiful latte only to find the foam too bubbly or not forgiving enough for latte art? If so, you’re not alone—and the good news is, with the right approach, you can fix this. Ready to turn your frothing failures into cafe-quality microfoam? Let’s dive in.
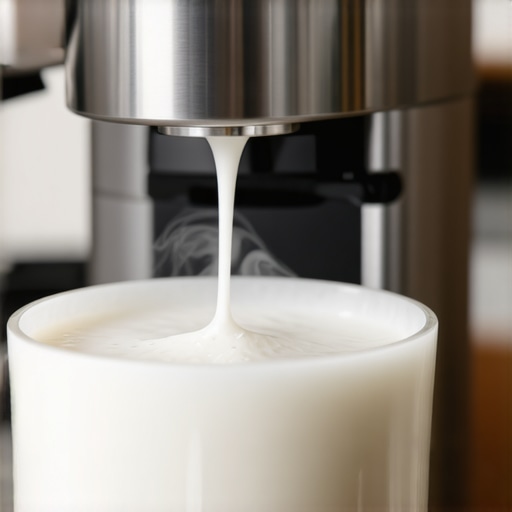
Start with Cold Milk and a Clean Pitcher
Use fresh, cold milk straight from the fridge to give yourself more control. Opt for whole milk if possible, as its fat content helps create smoother microfoam. Ensure your pitcher is spotless—residual milk or grease can hinder proper frothing. I once failed to clean my pitcher properly, resulting in inconsistent foam—so now, I always clean thoroughly before each session.
Position Your Milk Frother or Steam Wand Correctly
Submerge the tip just below the milk surface, angling the wand slightly to create a whirlpool effect. This motion incorporates air evenly, preventing large bubbles. When I first started, I struggled with positioning—my foam was bubbly and uneven. Adjusting the wand height and angle based on the manufacturer’s recommendations made a huge difference. For detailed tips, check out this guide.
Control the Temperature Like a Barista Pro
Steam the milk until it reaches approximately 140-150°F (60-65°C)—hot enough to enhance sweetness but not scald. Use a thermometer or learn to gauge temperature by touch, but a thermometer ensures consistency. I used to guess, and some batches were over or under-heated, ruining the microfoam. For precise techniques, see this resource.
Tilt and Swirl to Achieve Silky Microfoam
Keep the pitcher tilted at about 45°, and move the wand in a gentle circular motion. As the milk heats, you’ll notice a shiny, paint-like surface forming. Swirling helps break down larger bubbles, resulting in a cream-like microfoam. During my first try, rushing caused large bubbles and foam collapse. Embracing patience and gentle swirling elevated my microfoam quality. For more nuanced techniques, visit this guide.
Listen for the Hissing and Observe the Surface
A steady hissing sound indicates proper steaming—too loud or inconsistent sounds suggest incorrect positioning or temperature. Watch the surface; it should become glossy and smooth without large bubbles. I learned to listen closely, and over time, I could tell when my foam was ready for pouring. For detailed sensory cues, consult this guide.
Practice Pouring with Purpose to Shape Your Art
Hold your cup at a slight angle, and pour steadily into the center. As the pitcher lowers, move expressive wrist motions to create hearts or rosettas. My early attempts were messy, but breaking down the pour into sections—start high for the base, then lower for detail—helped me improve. For advanced pouring techniques, explore this resource.
While many enthusiasts focus on steaming temperature and pitcher technique, a common misconception is that the quality of microfoam solely depends on equipment or heating accuracy. In reality, subtle factors like milk composition, fat content, and even the type of frother used can dramatically influence your results. For example, some baristas believe that using skim milk is always better for microfoam, but in truth, whole milk often yields a creamier, more stable microfoam due to its fat content—a detail overlooked by many novices. Additionally, the myth that higher-powered milk steamers automatically produce better foam is misleading; in fact, lower wattage devices with precise control can often create more consistent and velvety microfoam. To master the craft, understanding the interplay between milk’s natural properties and your steaming technique is essential. Advanced baristas often manipulate factors like milk freshness, microstructure, and even the sequence of frothing and heating to optimize foam quality. A critical trap to avoid is rushing the process or using outdated equipment without proper calibration. This mistake undermines the delicate balance required for perfect microfoam, which can be achieved only through nuanced adjustments and experience. For those serious about elevating their latte art, exploring expert techniques—such as controlling the microstructure of milk by adjusting aeration levels—can make all the difference. According to a study published in the Journal of Coffee Research, the microstructure of steamed milk directly correlates with foam stability and texture, emphasizing the importance of understanding these deeper nuances. If you’re eager to refine your skills, consider reviewing more advanced techniques through resources like this guide, which dives into fine-tuning your frother and steamer settings for superior results. Remember, the journey to cafe-quality microfoam isn’t just about equipment—it’s about mastering the subtleties that make your coffee stand out. Have you ever fallen into this trap? Let me know in the comments.
Maintaining Your Coffee Setup for Consistent Microfoam
To keep your milk steamer and frother functioning at peak performance, regular maintenance is non-negotiable. I personally schedule weekly cleanings of my equipment, ensuring any milk residue or mineral build-up doesn’t compromise foam quality. Using a descaling solution once a month keeps your steamer’s internal components in top shape, preventing clogs and ensuring temperature accuracy. Remember, a well-maintained machine translates directly into better microfoam and more stunning latte art.
Tools I Depend On for Coffee Excellence
My go-to tool is a precision thermometer, which allows me to target that ideal 140-150°F range with ease. Investing in a high-quality milk pitcher with a stainless steel body and a well-designed spout has transformed my pouring control. For frothing, I prefer a variable temperature milk frother that doubles as a steam wand. It provides more nuanced control than traditional machines, especially during longer sessions or when experimenting with microstructure. To perfect my process, I also use a digital timer to track steaming durations, ensuring consistency across every cup.
Predictions for the Future of Milk Frothing Tools
The trend points towards smarter, AI-integrated equipment that offers real-time feedback on temperature, aeration, and foam texture. Devices with integrated sensors could guide even novice baristas through optimal frothing motions, reducing waste and improving results. As technology advances, I foresee a future where your smartphone app might calibrate your steamer automatically, ensuring every batch of microfoam is as perfect as your favorite café’s. For those keen to stay ahead, exploring advanced techniques like microstructure manipulation via modern frothers can elevate your craft—see this guide.
How do I maintain my equipment over time?
Consistent cleaning is critical. After each use, rinse your pitcher and wand thoroughly, and perform a deep clean weekly with a milk frother or steam wand cleaner. Using filtered water helps prevent mineral buildup, prolonging your machine’s lifespan. Refer to your equipment’s manufacturer’s maintenance instructions, and schedule regular descaling sessions. Additionally, keeping an eye on wear and tear, like cracked seals or damaged nozzles, and replacing parts promptly ensures your microfoam remains silky. Remember, equipment longevity depends on diligent upkeep, not just initial investment. For detailed maintenance routines, visit our contact page.While mastering microfoam can sometimes feel like chasing an elusive dream, embracing the nuanced art of milk steaming transforms each cup into a personal masterpiece. My journey showed me that patience, continuous practice, and understanding the subtle dance between steam, milk, and technique are the true keys. Remember, each mistake is an unspoken lesson guiding you closer to that silky microfoam that makes every latte art moment special. As you refine your skills, you’ll not only see improvements in your coffee’s appearance but also in its flavor complexity, texture, and overall experience. Keep experimenting, stay curious, and enjoy every step of your brewing adventure—your perfect microfoam is waiting.