
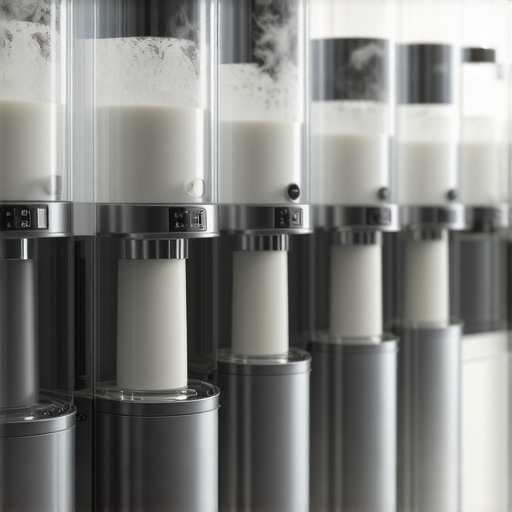
5 Fast-Recovery Milk Steamers for Busy 2026 Kitchens
It was a typical Monday morning when I almost lost my mind over a simple latte. I was racing against time, trying to craft that perfect microfoam for my cappuccino, only for the steam wand to sputter and sputter. Frustration quickly turned into realization—my old milk steamer just couldn’t keep up with my busy mornings anymore. That lightbulb moment led me down the rabbit hole of researching the best solutions to streamline my coffee ritual.
How a Fast-Recovery Milk Steamer Changed Everything
As someone who loves a good coffee but despises the wait, I decided to explore the world of 5 Fast-Recovery Milk Steamers for Busy 2026 Kitchens. These devices promise not just quicker heat-up times but also consistent microfoam quality—perfect for those hectic mornings when seconds matter. After trying a few out, I realized that investing in a high-quality, quick-recovery steamer made my morning routine smoother and far more enjoyable, allowing me to savor my coffee instead of rushing through it.
Prepare Your Milk and Equipment First
Start with cold, fresh milk, ideally whole or with higher fat content for creamier microfoam. Fill your pitcher no more than one-third full to allow space for frothing expansion. Use a clean, sharp steam wand to prevent uneven steaming. As I did during a busy morning, I prepped my pitcher and milk the night before, so when rush hour struck, everything was ready—saving set-up time.
Position the Steam Wand Correctly
Insert the steam wand just below the milk surface at a slight angle, aiming for a whirlpool motion. Imagine turning a spinning top—this orbits the liquid, creating even heat and consistent microbubbles. Once in position, open the steam valve fully. I remember my first attempt; I struggled with placement, but adjusting the wand slightly deeper helped eliminate unwanted splashing and aerated too much foam.
Control Your Steaming Technique
Engage the steam and listen for a gentle hissing sound; this indicates proper pressure. Keep the wand near the surface initially to introduce microbubbles, then slowly lower it to heat the milk evenly. Visualize it like painting with a gentle brush—steady, controlled strokes yield the best foam. In my trial, moving the pitcher in a small circle kept the microstructure uniform, resulting in silky microfoam perfect for latte art.
Monitor Temperature and Texture
Use a thermometer or learn to gauge milk temperature by touch—ideal microfoam is around 140°F to 150°F (60°C to 65°C). The milk should feel warm, not hot; overheating causes the foam to collapse or scald. I once overheated milk by ignoring the thermometer, ending up with flat foam that wouldn’t pour well. Practice, patience, and consistent heat control are the keys to success.
Create Microfoam with Precise Movements
Once the milk is heated, submerge the wand deeper to stop aeration and focus on texturing. Think of the process as kneading dough—gentle, rhythmic movements develop a fine, even microfoam. If you see large bubbles or frothy foam, you likely introduced too much air too quickly or didn’t swirl the pitcher adequately. For a deeper dive into techniques, check this guide on flawless microfoam creation.
Pour with Confidence to Achieve Latte Art
Once your milk has a shiny, velvety texture, it’s time to pour. Start by pouring from a height, then gradually lower the pitcher, controlling the flow to shape your art. Practice with simple hearts or rosettas; consistency in foam microstructure and pour technique determines success. I once fumbled during a busy morning, producing a disorganized pattern, but refining my pour speed and angle dramatically improved my latte art quality over time. For advanced tips, explore advanced latte art techniques here.
Many coffee enthusiasts and even seasoned baristas often hold onto misconceptions that can hinder their mastery of milk steaming and latte art. Let’s uncover some of these myths and explore the nuances that can make a real difference in your brewing experience.
Why the Perfect Microfoam Isn’t Just About Steaming Temperature
While many believe that heating milk to a specific temperature guarantees perfect microfoam, the real secret lies in understanding milk’s protein structure and how it reacts during steaming. Achieving silky microfoam requires controlling steam pressure, wand position, and pitcher movement—factors often overlooked by beginners. Skilled baristas know that even slightly over or under heating milk can cause the foam to collapse or become grainy, despite the temperature being ‘correct.’ For expert tips on fine-tuning your technique, visit this comprehensive guide.
Choosing the Right Tools for Long-Term Performance
Investing in quality tools is essential to maintain optimal milk frothing results over time. I personally rely on a high-precision digital thermometer, which ensures I heat the milk to the ideal 140°F to 150°F range—crucial for silky microfoam. For example, I recommend the Infrared Digital Thermometer by ThermoPro. It provides quick readings without disturbing the milk’s surface and helps prevent overheating, which can ruin microfoam consistency.
Another essential tool is a sturdy, well-designed milk pitcher. I use a 12 oz stainless steel pitcher with a narrow spout, which grants me better control during pouring and latte art creation. Regularly inspecting and replacing worn-out wands or attachments also ensures consistent steam pressure, vital for producing microfoam at the professional level.
Routine Maintenance Keeps the Steamers Going
Preventative maintenance is key. After each use, I wipe the steam wand with a damp cloth to prevent milk buildup. Weekly, I descale the device using a mixture of water and vinegar—following manufacturer instructions—thus avoiding limescale that hampers steam pressure. For detailed descaling methods tailored to your model, visit this guide.
How do I maintain my milk steamer over time?
Beyond routine cleaning, periodically checking the steam pressure and readiness is crucial. Use a pressure gauge if your machine supports it—ensuring consistent output. Upgrading worn or outdated parts, like the steam tip or gasket, can prevent pressure drops and help achieve that perfect microfoam consistently. Viewing your steamer as an investment rather than a one-time purchase encourages you to give it the proper care it deserves.
Future Trends in Milk Frothing Tools
The trend is moving toward smart, app-controlled steamers that monitor pressure, temperature, and cleaning cycles automatically. Such innovations promise fewer manual errors and more reliable long-term results. Already, some models incorporate self-cleaning modes and diagnostic alerts—a glimpse into how maintenance will become more effortless in the future.
If you’re serious about elevating your milk steaming game, I recommend adding a quality thermometer and scheduling regular descale sessions. For advanced techniques to perfect your microfoam and latte art, explore these expert tips. Try one today, and enjoy consistently stunning coffee creations tomorrow!

The Hardest Lesson I Learned About milk steamer,latte art,cappuccino,microfoam,milk frother
I realized early on that even the best equipment can’t fix fundamental technique issues. I once spent hours troubleshooting my steam wand, only to discover that my shaky hand and inconsistent movements were the real culprits. The lightbulb moment came when I focused on stabilizing my grip and controlling my pour, which dramatically improved my microfoam quality and latte art success.
3 Myths About milk steamer,latte art,cappuccino,microfoam,milk frother That Held Me Back
I used to believe that heating milk to exactly 150°F was all I needed, but I overlooked the importance of controlling steam pressure and pitcher positioning. Also, I thought a bigger steam wand meant better foam, but a narrow tip and proper technique made a bigger difference. Busting these myths opened my eyes to the real skills behind professional-level microfoam and art.
What Experts Won’t Tell You About milk steamer,latte art,cappuccino,microfoam,milk frother
Behind the scenes, seasoned baristas often prioritize consistent routine and equipment maintenance over flashy gadgets. Regularly cleaning and descaling my steamer improved microfoam stability more than any fancy tool. The secret lies in disciplined practice and meticulous care—lesser-known yet powerful habits that elevate coffee mastering from good to exceptional.
Where to Go from Here
If you’re serious about elevating your milk frothing game, I recommend exploring top-rated steamers that suit your needs and budget, ensuring durability and top performance. Complement your setup with expert-guided techniques from resources like these tutorials to refine your pour and microfoam skills. Remember, mastery is a journey rooted in patience and continuous learning, so keep experimenting and savoring each improvement.