
Master Microfoam & Latte Art with Top Milk Steamer & Frother Guides
My Journey Into the Art of Microfoam and Latte Creations
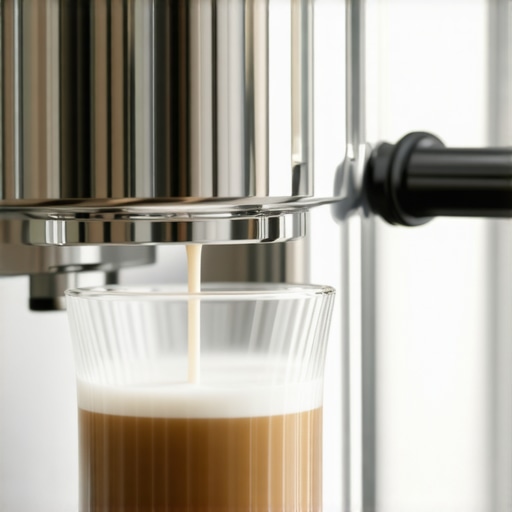
Ever since I first started experimenting with my espresso machine, I was captivated by the velvety microfoam that transforms a simple coffee into an artful masterpiece. I remember the first time I tried to create a heart in my latte—let’s just say it was more of a splatter than a perfect shape! But with patience, practice, and a few personal insights, I learned how to master the microfoam and elevate my latte art skills.
The Importance of a Quality Milk Steamer & Frother
One of the most significant upgrades in my coffee journey was choosing the right milk steamer and frother. I discovered that investing in a top-tier milk steamer significantly impacts the smoothness and consistency of microfoam. A good steamer ensures that the milk heats evenly and creates those tiny, stable bubbles essential for that silky texture. For anyone serious about coffee artistry, exploring options like those reviewed in this guide can be a game changer.
My Favorite Techniques for Flawless Microfoam
Over time, I refined my technique by focusing on the milk’s temperature and positioning of the steam wand. I aim for a temperature around 140°F (60°C) as recommended by professional baristas, which helps achieve that perfect, glossy microfoam. I also learned that positioning the wand just below the milk surface initially creates those tiny bubbles, then submerging it deeper to heat the milk evenly. For more detailed tips, I frequently revisit this comprehensive article.
What Makes Microfoam Ideal for Latte Art?
When I first mastered microfoam, I realized its importance in creating detailed latte art. The microfoam’s smooth, velvety texture allows it to flow easily and hold intricate designs. It’s fascinating how the tiniest bubbles can make or break the entire artwork. I often ask myself, “How do professional baristas make those stunning patterns look effortless?” The secret lies in consistency and control, which I continue to develop through practice and experimenting with different steaming techniques.
Is It Possible to Achieve Microfoam Without Professional Equipment?
Honestly, I wondered this myself early on. While professional tools make the process easier, I found that with a good-quality handheld frother and careful technique, you can still produce decent microfoam. The key is patience—steadily adjusting your steam wand or frother until you get that silky texture. For beginners, I recommend starting with simple tutorials and gradually working towards more complex designs.
If you’re passionate about perfecting your milk steaming skills, I encourage you to share your experiences below! Connecting with fellow coffee lovers has enriched my journey, and I’d love to hear what works for you.
For more expert advice, check out this detailed guide.
Unlocking the Secrets of Texture: How Do Professional Baristas Achieve That Ultra-Smooth Microfoam?
One of the most intriguing aspects of expert milk steaming is the ability to consistently produce velvety microfoam that holds intricate latte art. Achieving this requires a nuanced understanding of steam wand positioning, milk temperature, and even the milk’s fat content. Professional baristas often emphasize the importance of creating a whirlpool effect in the milk, which helps in integrating the microbubbles uniformly. This technique ensures that the microfoam is dense, smooth, and glossy, ideal for detailed latte art. For those eager to refine their skills, exploring detailed tutorials like this comprehensive guide can be invaluable.
Beyond Basics: How Does Milk Composition Affect Microfoam Quality?
Different types of milk—whole, skim, or plant-based alternatives—behave uniquely when steamed. Whole milk, with its higher fat content, tends to produce richer, creamier microfoam but requires careful temperature control to avoid scorching. Skim milk, on the other hand, can create a lighter, more airy foam but demands precise steaming to prevent large bubbles. Plant-based milks vary even more; some, like oat or soy milk, foam well due to their protein content, while almond milk may struggle with stability. Understanding these nuances allows baristas and enthusiasts to tailor their approach for optimal results. For deeper insights into these variations, consult this expert resource.
Can You Achieve Barista-Level Microfoam at Home Without Professional Equipment?
Absolutely. While commercial steamers are designed for precision and consistency, high-quality handheld frothers or even some innovative manual options can produce impressive microfoam with practice. The key lies in controlling the milk’s temperature, agitation speed, and technique. For example, starting with cold milk and gradually warming it while frothing helps develop a silky texture. Patience and experimentation are essential, especially when striving for that perfect glossy microfoam suitable for latte art. For more practical tips, visit this detailed guide.
If you’re passionate about elevating your milk steaming game, I encourage you to share your experiences or ask questions below. Connecting with other coffee enthusiasts enriches the journey and accelerates learning.
For further expert advice and advanced techniques, check out this in-depth resource.
Unlocking the Nuances of Microfoam Texture and Its Impact on Artistic Expression
As I delved deeper into the world of microfoam, I realized that achieving a velvety, glossy texture is only part of the equation. The real artistry lies in understanding how subtle variations in microfoam’s density and stability influence the complexity of latte art designs. For instance, I discovered that microfoam with a slightly higher viscosity allows for more intricate etching, enabling me to craft delicate rosettas and complex patterns that seem almost alive on the surface of the coffee. This insight came after experimenting with different steaming techniques and milk compositions, revealing that the microbubble size and uniformity are crucial factors in creating a canvas capable of detailed expression.
How Do Variations in Milk Composition Alter Microfoam’s Artistic Potential?
My journey into exploring different types of milk has unveiled a fascinating array of microfoam behaviors. Whole milk, rich in fat, creates a creamy microfoam that lends itself beautifully to smooth, flowing designs, but it requires a gentle steaming approach to prevent overheating. Skim milk, with its higher protein content, produces a lighter, more airy foam that’s perfect for delicate etching but can be more challenging to control. Plant-based milks introduce another layer of complexity; for example, oat milk tends to foam well and retains a stable microfoam longer, opening new creative avenues for vegan coffee art. Understanding these nuances has empowered me to tailor my approach based on the milk I use, ultimately elevating my latte art to new heights. For those seeking to refine their technique further, I highly recommend exploring this comprehensive resource.
Can Advanced Steaming Techniques Be Practiced Without Professional Equipment?
Absolutely. I often pondered whether professional equipment is indispensable for creating microfoam that rivals that of seasoned baristas. Through my experimentation, I found that with a high-quality handheld frother and meticulous attention to temperature control, impressive results are attainable. The key is to master the art of controlling the steam or frothing action—starting with cold milk, gradually increasing the temperature, and maintaining steady agitation. Patience is essential; I often spend extra minutes refining my technique, adjusting the angle and depth of the frother, and monitoring milk temperature with a reliable thermometer. These practices, combined with a focus on milk quality, enable me to produce microfoam suitable for stunning latte art even at home. For a detailed step-by-step guide, I recommend visiting this resource.
What Are the Most Critical Factors for Consistently Perfect Microfoam?
From my experience, consistency hinges on a combination of precise temperature control, milk composition, and steaming technique. The whirlpool effect created by proper wand positioning ensures microbubbles form uniformly, resulting in a smooth, dense microfoam. Additionally, using fresh, cold milk and steaming it to around 140°F (60°C) is vital; exceeding this temperature risks breaking the microfoam apart. I’ve also learned to pay close attention to the milk’s initial texture—starting with cold milk allows for better control and more stable microfoam development. Developing a routine that emphasizes these factors has significantly improved my results over time. For those eager to elevate their skills further, exploring this advanced guide can provide invaluable insights.
What’s Next in My Coffee Journey? Exploring New Techniques and Artistic Challenges
As I continue to refine my microfoam mastery, I’m increasingly drawn to experimenting with multi-layered designs and incorporating color into my latte art. The challenge of maintaining microfoam integrity while adding artistic elements pushes me to explore new techniques, such as utilizing stencils or edible color powders. I’ve also become curious about the potential of using nitrogen-infused milk to create textured, three-dimensional effects—an emerging trend I look forward to exploring further. Coffee artistry is a perpetual journey of discovery, where each cup offers a new canvas and each technique unlocks new creative possibilities. I invite fellow enthusiasts to share their experiences and innovative ideas—let’s learn and grow together in this fascinating craft.
If you’re passionate about pushing the boundaries of microfoam and latte art, I encourage you to connect through comments or explore more advanced techniques at this resource. The journey is as rewarding as the art itself!
Refining Microfoam Texture for Artistic Mastery
Achieving microfoam with a velvety, glossy consistency is a nuanced craft that separates amateur attempts from professional artistry. The secret lies in controlling the microbubble size and uniformity, which directly influences the microfoam’s ability to hold intricate patterns. I have found that adjusting the angle of the steam wand to create a gentle whirlpool effect in the milk fosters a more homogeneous microfoam, facilitating detailed etching and free-pour designs. This technique, rooted in the principles of fluid dynamics, allows for a more controlled and stable microfoam, elevating the visual and tactile quality of each cup.
Strategic Milk Composition for Artistic Versatility
Understanding the influence of milk composition on microfoam behavior unlocks new creative possibilities. Whole milk’s higher fat content produces a richer, more luscious microfoam, ideal for smooth, flowing designs, whereas skim milk’s higher protein content offers a lighter, more airy foam suited for delicate etching. Plant-based milks, such as oat or soy, have their unique profiles; oat milk’s natural starches promote stable microfoam, enabling complex patterns even in vegan latte art. By customizing milk choice based on desired artistic effect, I have expanded my repertoire and achieved more refined, expressive designs. For an in-depth exploration of milk types, check out this comprehensive resource.
Can Advanced Steaming Techniques Be Practiced at Home Without Professional Equipment?
Absolutely. While commercial steamers offer precision, I’ve demonstrated that high-quality handheld frothers, combined with meticulous temperature management, can produce microfoam comparable to professional standards. The key is to start with cold milk, gradually increase the temperature while frothing, and maintain steady agitation. Using a reliable thermometer helps me stay within the optimal 140°F (60°C) range, ensuring the microfoam remains silky and stable. Consistent practice with these techniques can bridge the gap between home and professional quality, empowering enthusiasts to craft stunning latte art without expensive equipment. For practical step-by-step guidance, visit this detailed guide.
The Art of Microfoam Control: Elevating Your Craft
Controlling microfoam density and stability is essential for complex latte art. I have experimented with varying the steaming duration and adjusting the steam wand’s position to refine the microbubble size. Shorter steaming times tend to produce denser microfoam suitable for pouring, while longer sessions can create lighter foam ideal for etching. Mastering this balance enables the creation of intricate designs that require both flow and precision. Moreover, paying attention to the milk’s initial temperature and freshness significantly impacts the microfoam’s quality. Developing a consistent steaming routine, emphasizing these variables, has been pivotal in my artistic growth. For advanced insights, explore this expert resource.
Innovative Techniques to Push Creative Boundaries
To further elevate my latte art, I’ve begun experimenting with multi-layered designs and incorporating color through edible powders. The challenge lies in maintaining microfoam integrity during layered pouring, which requires precise control over flow speed and microfoam consistency. Additionally, I am exploring nitrogen-infused milk to achieve textured, three-dimensional effects that add depth and complexity to my creations. These innovations demand a deep understanding of microfoam behavior and meticulous technique, but they open exciting new avenues for artistic expression. I invite you to share your experiments and insights—together, we can push the boundaries of coffee artistry. For more advanced techniques, see this resource.
Things I Wish I Knew Earlier (or You Might Find Surprising)
The Microfoam’s Hidden Secret
One thing I wish I had realized sooner is how critical the milk’s temperature is for microfoam quality. I once over-steamed milk and ended up with large bubbles that ruined my latte art. Since then, I’ve learned that maintaining that sweet spot around 140°F (60°C) makes all the difference. It’s a small detail that transforms your microfoam from average to professional-looking.
The Power of Milk Fat Content
I used to think all milk foamed equally, but I was surprised to find that whole milk with higher fat content creates a richer, silkier microfoam. Skim milk, while lighter, can produce airy foam that’s great for delicate etching. Experimenting with different milk types opened new creative doors for me and helped tailor my latte art to my mood or style.
Steaming Technique Matters More Than You Think
I used to focus only on the milk, but I discovered that the position of the steam wand and the whirlpool effect are crucial. Proper wand placement creates microbubbles evenly, making the microfoam smoother and more stable. It’s like a dance—once I got the technique right, my microfoam improved dramatically, and my designs became more intricate.
Microfoam Without Professional Equipment
I used to believe only professional steamers could produce good microfoam, but I was pleasantly surprised to find that high-quality handheld frothers can do the job too. With patience and attention to temperature, I managed to craft microfoam suitable for beautiful latte art at home, proving that you don’t need expensive gear to start.
Microfoam’s Impact on Artistic Expression
Finally, I realized that microfoam isn’t just about texture; it’s a canvas for creativity. The density and stability of microfoam influence how detailed and complex my latte art can be. Small adjustments in steaming technique can unlock new artistic possibilities—making each cup a personal masterpiece.
Resources I’ve Come to Trust Over Time
- Espresso Tech Guide: This site offers comprehensive tutorials on milk steaming and frothing techniques. It’s my go-to resource for troubleshooting and advanced tips, especially the Ultimate Milk Frothers Guide.
- Barista Hustle: A trusted platform with in-depth articles on professional coffee skills. Their insights on microfoam consistency and steaming science have elevated my understanding significantly.
- Home Barista: Practical tips tailored for enthusiasts, including step-by-step videos on achieving microfoam at home with simple tools. It’s a treasure for beginners and intermediate learners alike.
Parting Thoughts from My Perspective
Mastering the art of microfoam is a journey of continuous learning and experimentation. From understanding the importance of milk temperature and fat content to refining steaming techniques, every small adjustment can lead to remarkable improvements. The key is patience and curiosity—don’t be afraid to try different methods and explore new resources. I believe that anyone can achieve beautiful microfoam and create latte art that sparks joy and connection. If this resonated with you, I’d love to hear your experiences or tips—feel free to share in the comments or reach out through the resources listed. Happy frothing!
Reading about your journey into microfoam and latte art really resonated with me. I started experimenting only a few months ago, and I was surprised at how much the microfoam quality can change the overall look and feel of my latte art. I agree that controlling the milk temperature and wand position makes a significant difference. One challenge I still face is maintaining that perfect microbubble size consistently. I’ve found that using a digital thermometer and practicing the whirlpool technique helps, but I’m curious—have you tried any specific milk brands or alternative milks that help achieve more stable microfoam? I’ve been exploring plant-based options lately, like oat milk, which seem promising but sometimes behave unpredictably. I’d love to hear other recommendations or tips to refine microfoam even further. Thanks for sharing your insights—this motivates me to keep practicing and experimenting!
Your detailed journey into microfoam and latte art resonates deeply with me, especially the emphasis on milk temperature and technique. I’ve found that the type of milk I use can make a huge difference in how well I can control microfoam, especially when working with plant-based options. For example, oat milk has consistently produced stable, velvety microfoam in my experience, though I’ve had to adjust steaming times and temperature to prevent overheating. Regarding your point about the whirlpool technique, I’ve also incorporated a slight Vortex movement in my steaming process to promote microbubble consistency. One thing that significantly improved my results was investing in a quality microfoam thermometer and practicing with small batches to fine-tune my approach. Have you experimented with different milk brands or prepared any custom blends for improved microfoam? I’d love to learn what has worked for others in achieving reliable, professional-quality microfoam at home, especially with dairy alternatives.
I’ve really enjoyed reading about your journey into mastering microfoam—it resonates with my own experience. I agree wholeheartedly that the choice of milk and the technique of steaming are crucial for consistent, velvety microfoam. In my case, I’ve started experimenting with different brands of whole milk to perfect the balance of fat and protein, which seems to impact the microfoam stability. Interestingly, I’ve recently begun using oat milk, and while it can be trickier to get right, I find that paying close attention to steaming times and temperature helps. A tip I picked up is to use a thermometer and to carefully position the steam wand just below the surface to initial create those tiny bubbles, then immerse it deeper for heating. Do you have any preferred brands or specific tips for handling plant-based milks? I’d love to hear more about what has worked for you or others at home, especially in achieving that rich, glossy microfoam for detailed latte art.
Your journey into mastering microfoam and latte art really strikes a chord with me. I’ve been exploring this craft for a while now, and I’ve found that the quality of the milk and the steaming technique are indeed vital. One thing I’ve started doing differently is experimenting with different milk types, especially plant-based options like oat and almond milk, which tend to behave differently but offer exciting creative possibilities. I’ve also invested in a good-quality thermometer to keep the milk at that ideal 140°F (60°C). My biggest challenge has been maintaining consistent microbubble size, especially when working with non-dairy milk. Have you come across any specific brands or prepping methods that help stabilize microfoam with alternative milks? I’m keen to hear more about how others are tackling this, as it’s such an interesting aspect of the process. Thanks for sharing your insights—they truly motivate me to keep refining my skills and trying new techniques.
Reading about your detailed journey into microfoam and latte art really resonates with my own experience. I remember the first few times I tried steaming milk, I struggled with getting that silky microfoam everyone talks about. Like you, I’ve found that controlling the milk temperature around 140°F and positioning the steam wand just right makes all the difference. I also experimented with different types of milk; for instance, I found that oat milk works well for microfoam, especially when I use barista-blend versions designed for steaming. However, I’ve noticed that some brands are more consistent than others. Do you have any favorite brands or techniques for non-dairy milks that consistently produce good microfoam? It’s such a fascinating aspect of coffee artistry, and I’m always looking to refine my technique and incorporate new methods. Thanks for sharing your insights; it really motivates me to keep practicing and experimenting more!
Hi there! I really enjoyed your detailed recount of exploring microfoam and latte art. Like you, I found that the key to great microfoam starts with choosing the right milk and mastering the steaming process—getting the temperature right around 140°F is crucial. I also started noticing how different brands and types of milk behave, especially plant-based milks like oat and almond. For example, I’ve had better results with certain oat milk brands that are formulated for barista use, which helps especially when trying to maintain consistency in microbubble size. What’s been most helpful for me is experimenting with steaming time and aeration, plus using a good thermometer for accuracy. Do you have any favorite non-dairy milk brands or particular prep tips? I’d love to hear your thoughts, especially about achieving stable microfoam with alternative milks, which can be quite tricky sometimes.
Your detailed recount of mastering microfoam and latte art truly resonates with me. I started my journey into coffee craftsmanship about a year ago, and I quickly learned that consistency in steaming technique is key. One thing I’ve found particularly helpful is experimenting with milk temperature and positioning the steam wand, much like you described. I’ve also discovered that certain brands of oat milk, especially those labeled as barista blends, tend to produce more stable microfoam, which is perfect for intricate latte art. My question is, have you tried any specific tips or tricks for controlling microfoam with different plant-based milks? I find that each type—almond, soy, oat—behaves differently, so tailoring the steaming process is necessary. I’d love to hear your insights or any recommendations that have worked well for you. Thank you for sharing your journey; it’s inspiring and motivates me to keep refining my skills.