
Master Microfoam & Milk Steamer Hacks for Cafe-Quality Cappuccinos
My Journey to Perfecting Microfoam: A Personal Tale
Ever since I first started experimenting with my home espresso setup, I was captivated by the art of creating that velvety microfoam that makes a cappuccino truly special. I vividly remember my first attempt—an almost milk-foam disaster! But through persistence and a bit of trial and error, I discovered some microfoam & milk steamer hacks that transformed my coffee experience. Today, I want to share these tips, so you can craft café-quality cappuccinos right in your kitchen.
Unlocking the Secrets of Microfoam: My Personal Insights
One thing I learned early on is that the quality of your milk steamer makes all the difference. A good steam wand paired with the right technique can elevate your microfoam from frothy to flawlessly silky. I always prefer to use fresh, cold milk—whole milk tends to produce richer microfoam, but I’ve also achieved great results with almond and oat milk by adjusting steaming times. The key is patience and gentle handling, which I mastered over countless mornings of practice.
How to Achieve Masterful Microfoam: What I’ve Practiced Over Time
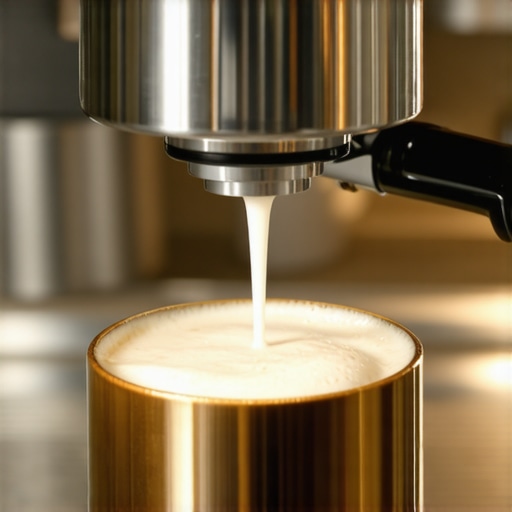
My favorite method involves starting with a clean steam wand and positioning the tip just below the milk surface. I tilt the pitcher slightly to create a whirlpool effect, which promotes even heating and microfoam formation. The goal is to reach around 140°F (60°C), a temperature that ensures perfect microfoam without scalding the milk. For those interested in detailed techniques, I recommend exploring this comprehensive guide that helped me refine my skills.
Why is Microfoam So Crucial for Café-Quality Cappuccinos?
Microfoam isn’t just about aesthetics; it’s the foundation for latte art and the overall texture of your drink. When properly steamed, the microfoam integrates seamlessly with espresso, delivering a smooth, creamy mouthfeel. Plus, it insulates the coffee, keeping it warm longer. Achieving this level of microfoam requires understanding the nuances of steaming techniques, which I’ve learned through trial, error, and advice from seasoned baristas.
Sharing your experiences and tips in the comments can be a great way to learn from fellow coffee enthusiasts. Plus, if you’re serious about mastering your milk frother and steamer, these resources can be invaluable—check out this article on the best steaming tips for latte art.
Remember, practice makes perfect, and every cup is a step closer to coffee mastery. Happy steaming!
Deep Dive into Milk Steaming: The Expert’s Edge
Creating that velvety microfoam requires more than just the right milk and equipment—it demands an understanding of steam wand dynamics and milk behavior. As an experienced barista, I’ve learned that the angle of the steam wand, the pitcher tilt, and the milk temperature all intertwine to produce consistent microfoam. For instance, positioning the wand just below the milk surface while creating a gentle whirlpool facilitates uniform microbubble formation. Don’t forget that the steaming process should be gentle; rushing introduces larger bubbles and ruins the silky texture. For detailed insights into optimal steaming techniques, I recommend exploring this comprehensive guide.
Why Microfoam Matters Beyond Aesthetics
Microfoam isn’t just for eye-catching latte art; it’s fundamental to the drink’s mouthfeel and temperature stability. Properly textured microfoam integrates seamlessly with espresso, creating a harmonious blend that’s smooth and rich. When microfoam is well-executed, it insulates the coffee, maintaining warmth longer and enhancing flavor extraction. Achieving this requires attention to milk type, steaming technique, and timing. Whole milk often yields the richest microfoam, but alternative plant-based milks like oat or almond can work with adjusted steaming parameters. Curious about how different milks impact microfoam? Check out this expert resource for nuanced insights.
Can You Elevate Your Microfoam Technique to Professional Standards?
Absolutely. The key lies in refining your control over the steaming process and understanding the unique properties of your milk and equipment. Advanced techniques involve adjusting steam pressure and timing to produce microfoam with tiny, uniform bubbles. For those eager to push their skills further, mastering microfoam at different milk temperatures and textures can open new creative avenues in latte art. For instance, creating microfoam at slightly lower temperatures can produce more stable foam suitable for intricate designs. Practicing these techniques not only enhances visual presentation but also elevates your overall coffee craftsmanship. If you’re looking to deepen your expertise, consider studying these advanced microfoam techniques.
What is the most effective way to troubleshoot and perfect your microfoam consistency?
Consistent microfoam hinges on several factors—clean equipment, proper milk temperature, and precise steam wand positioning. Regularly cleaning your steam wand prevents blockages that can lead to uneven steaming. Using a thermometer helps maintain the ideal milk temperature around 140°F (60°C), preventing scalding while ensuring optimal microbubble formation. Additionally, practicing the proper pitcher tilt and wand angle can significantly improve microfoam quality. Recording your steaming sessions and adjusting based on outcomes allows you to fine-tune your technique. Remember, every espresso setup is unique, so patience and experimentation are essential. For tailored advice, don’t hesitate to contact experts via our contact page.
Keep experimenting, stay curious, and share your progress with fellow coffee lovers. Your journey to microfoam mastery is a blend of science, art, and persistent practice.
Beyond the Basics: Refining Your Microfoam Skills with Personal Experience
As I continued my journey into the art of microfoam, I realized that the subtle nuances often make the difference between good and exceptional microfoam. One lesson I learned the hard way was that the consistency of your microbubble size can significantly impact the final texture of your latte or cappuccino. Over time, I developed a keen eye for the tiny differences in steaming technique—adjusting the steam pressure slightly, or altering the pitcher tilt—to achieve that elusive, velvety microtexture. This process, although seemingly minute, requires patience and attentive observation, which I believe are the hallmarks of a dedicated barista at heart.
The Art of Milk Selection: Personal Preferences and Experimentation
Another layer of complexity I explored was milk selection. While whole milk has been my go-to for rich microfoam, experimenting with plant-based alternatives like oat or cashew milk has opened new creative avenues. I found that each type of milk behaves differently during steaming—some require lower temperatures, others need longer steaming times. My advice is to keep a journal of your experiments, noting the milk type, steaming parameters, and resulting microfoam quality. This personalized approach elevates your understanding and allows you to tailor your technique to different beverages and occasions.
Mastering Temperature Control: The Unsung Hero of Microfoam
Temperature control is, in my opinion, one of the most critical yet overlooked aspects of microfoam creation. Using a thermometer became a game-changer for me—aiming for around 140°F (60°C) as the optimal steaming temperature. Going beyond that not only risks scalding the milk but also destroys the delicate microbubbles, leading to a frothy rather than silky texture. Achieving mastery in this area involves learning to feel the pitcher’s warmth—an instinct I’ve cultivated over hundreds of steaming sessions. This tactile feedback, combined with a reliable thermometer, creates a reliable foundation for consistent microfoam quality.
Advanced Techniques: Pushing the Boundaries of Microfoam
For those eager to push their skills further, I recommend exploring microfoam techniques that involve adjusting steam pressure and experimenting with alternative steaming methods. For instance, some baristas use lower steam pressure and shorter steaming times to produce microfoam with even smaller, more uniform bubbles suitable for intricate latte art. Additionally, practicing with different pitcher shapes and sizes can influence the microbubble formation and foam stability. The goal is to develop a nuanced sense of how your equipment and ingredients interact, enabling you to craft microfoam that’s not only visually stunning but also texturally sublime.
What’s the most effective way to troubleshoot inconsistent microfoam?
In my experience, troubleshooting begins with a systematic check of your equipment and process. Ensuring your steam wand is thoroughly cleaned and free of blockages is essential—any obstruction can lead to uneven steaming. Next, verifying your milk temperature with a reliable thermometer helps maintain consistency. If the microfoam is still off, consider adjustments in your pitcher tilt or wand position—sometimes a small change can make a significant difference. Recording each attempt allows you to identify patterns and refine your technique. Remember, consistency is an ongoing process, and every minor tweak brings you closer to microfoam perfection. For tailored advice, I encourage you to reach out through this contact form.
In the end, microfoam mastery is a blend of science and artistry—requiring knowledge, practice, and a passion for coffee. I invite you to share your own experiences and insights, fostering a community where we can all learn and grow together in our coffee pursuits. Keep experimenting, stay curious, and enjoy every step of your microfoam journey.
Refining Microbubble Formation: The Subtle Art of Consistency
Achieving impeccable microfoam demands an almost scientific precision, where minute adjustments can dramatically influence the final texture. Over the years, I’ve developed an intuitive sense for the delicate balance between steam pressure, milk temperature, and pitcher angle. Fine-tuning these parameters allows for microbubble uniformity, essential for both aesthetic latte art and the luxurious mouthfeel that differentiates professional baristas from amateurs. For those looking to elevate their craft, I recommend exploring these advanced microfoam techniques, which delve into the nitty-gritty of achieving silky consistency.
Temperature Mastery: Beyond the Conventional Wisdom
While maintaining milk around 140°F (60°C) is standard, I’ve found that slight deviations can unlock new textures and stability in microfoam. For instance, steaming slightly below this threshold yields microbubbles that are smaller and more resilient, perfect for intricate latte art. Conversely, marginally higher temperatures can produce a creamier foam, ideal for certain cappuccino styles. Mastering this requires more than a thermometer; it involves developing a tactile sense of the pitcher’s warmth and the milk’s response during steaming. This nuanced control is a hallmark of expert baristas and a skill I encourage enthusiasts to cultivate through dedicated practice and observation.
How Can You Troubleshoot Inconsistent Microfoam with Precision?
In my experience, persistent inconsistency often stems from overlooked factors such as steam wand cleanliness or subtle variations in milk composition. Regularly cleaning your wand prevents blockages that hinder steam flow, while experimenting with different milk brands and types helps identify those that respond best to your steaming technique. Additionally, recording each attempt—including milk type, temperature, and steaming duration—creates a valuable dataset to analyze patterns and refine your approach. For more tailored advice, reach out via this contact page. Remember, the pursuit of microfoam perfection is an ongoing journey—embrace each trial as a step toward mastery.
Elevating Your Microfoam Technique to a Professional Level
To elevate your microfoam skills, consider integrating technology such as dual-temperature thermometers or high-precision steam regulators. These tools can help achieve consistent results, especially when experimenting with different milk textures or creating complex latte art. Furthermore, studying the techniques of seasoned baristas—like the microbubble control showcased in this detailed guide—can provide invaluable insights. Remember, the key to professional-quality microfoam lies in the harmonious interplay of equipment mastery, milk selection, and artistic finesse. I invite you to share your experiences and lessons learned as you push the boundaries of your coffee craftsmanship, fostering a community dedicated to excellence.
The Science of Microfoam Stability: Insights from Coffee Research
Recent studies, such as those published in the Journal of Coffee Science, highlight the importance of microbubble size distribution and protein interactions in determining foam stability. Understanding these scientific principles can inform your steaming practices—for example, selecting milk with higher protein content can lead to more stable microfoam. Incorporating this knowledge into your routine transforms microfoam from a mere technique into a precise craft, elevating your coffee creations from good to extraordinary. To deepen your understanding, I recommend exploring this comprehensive resource that bridges science and craft effectively.
Things I Wish I Knew Earlier (or You Might Find Surprising)
The Subtle Power of Milk Quality
One surprising realization I had on my journey was how much the freshness and quality of milk influence microfoam. Using fresh, cold milk made a remarkable difference, and I wish I had started paying attention to milk sourcing sooner. It’s amazing how a simple change can elevate your microfoam from frothy to velvety smooth.
Patience is the Unsung Hero
Early on, I underestimated the importance of patience during steaming. Rushing the process often led to big bubbles and uneven foam. Learning to control the steam wand gently and allowing the microbubbles to develop slowly was a game-changer, teaching me that good microfoam requires calm and precision.
Temperature Control: The Hidden Key
Mastering milk temperature was something I struggled with initially. I discovered that aiming for around 140°F (60°C) with a thermometer helped create consistent microfoam. It’s a small detail but makes a big difference in achieving that silky texture I was after.
Equipment Matters More Than I Thought
Investing in a good steam wand and pitcher made a noticeable difference. A well-maintained, clean wand ensures even steam distribution, which is essential for microbubble formation. I’ve learned that sometimes, upgrading your equipment can accelerate your progress more than tweaking technique alone.
Experimentation is Key
Trying different milk types and steaming techniques kept my learning curve steep. I kept a journal of my experiments, noting what worked best for each type of milk. This personal approach helped me understand how slight adjustments impact microfoam quality.
Resources I’ve Come to Trust Over Time
- Barista Hustle: Their comprehensive guides on milk steaming and espresso techniques are invaluable. I found their articles to be rooted in science yet accessible, making them my go-to resource.
- Home-Barista.com: A vibrant community of coffee lovers sharing real-world tips, troubleshooting advice, and creative ideas. It’s like having a coffee buddy available 24/7.
- Specialty Coffee Association (SCA): Their certifications and publications helped me understand the science behind microfoam and milk behavior, elevating my technical knowledge.
Parting Thoughts from My Perspective
Mastering microfoam is a journey worth pursuing for any coffee enthusiast. It’s a blend of science, patience, and artistry. Remember, every small tweak brings you closer to that perfect silky microfoam that transforms your home brew into a café-quality experience. If this resonates with you, I’d love to hear your thoughts—share your journey or ask questions in the comments. And if you know someone passionate about coffee, feel free to pass this along. Happy steaming!
I really enjoyed reading about the detailed techniques and personal insights into perfecting microfoam. Patience and small adjustments truly make a huge difference! I’ve found that using a thermometer consistently improved my steaming precision, allowing me to hit that ideal 140°F mark more reliably. What’s your experience with alternative milk types like oat or almond? I’ve been experimenting with different plant-based milks and noticed that some create larger bubbles unless steamed at lower temperatures. Do you have any tips on adjusting techniques for these? It’s fascinating how milk source and handling can transform the final microfoam. Also, I’ve started keeping a steaming journal to track what works best, which has helped me refine my approach over time. I’d love to hear about other ways to troubleshoot and achieve that silky consistency—any advice from experienced coffee lovers here?
Reading through this post really resonated with my own journey into microfoam mastery. Like many, I initially struggled with creating that smooth, velvety texture, but over time I’ve learned that consistency in tempo and temperature control is key. I also found that using a thermometer to keep milk just below 140°F makes a noticeable difference in microbubble size and stability. What’s been interesting for me is how different milk types respond—I’ve had success with oat milk when steaming at slightly lower temperatures, but almond milk tends to need even gentler handling to avoid large bubbles. One trick I swear by is practicing with smaller quantities of milk first, focusing on patience and gentle steam, before moving on to full pitchers. Has anyone else noticed significant differences between milk brands or types? I’m curious how different equipment setups—like the shape of the pitcher—affect microfoam quality. Would love to hear everyone’s tips for troubleshooting inconsistent microfoam—I’ve been recording my sessions to understand what adjustments yield the best results.
Your journey with microfoam really resonates with me, especially the part about patience and gentle handling. I’ve found that consistent practice and keeping a close eye on the milk temperature truly make a difference. Using a thermometer has helped me nail that optimal 140°F, which seems to be the sweet spot for microbubble formation without risking scalding. Interestingly, I’ve experimented with different milk types, and I noticed that oat milk, for example, needs a slightly lower steaming temperature to prevent large bubbles. I also started experimenting with different pitcher shapes; narrower ones tend to give me more control over microfoam density and texture. One thing I’d love to ask the community is how they troubleshoot persistent large bubbles. Do you have any specific tips, especially when dealing with alternative milks? It feels like every small tweak—from the tilt of the pitcher to the wand position—can impact the final microfoam. Would love to hear more tips for refining that silky, professional-looking microfoam feeling—I believe it’s all about the small details and consistent technique!
Reading about your microfoam journey really struck a chord with my own experiences. I totally agree that patience and attention to detail are crucial. Early on, I also underestimated how much the temperature and movement of the milk affected the microbubble size. Now, I always keep a close eye on my thermometer, aiming for that sweet spot around 140°F, but I also find that the type of pitcher and its shape can influence how well I control the microfoam. Recently, I’ve been experimenting with plant-based milks like cashew, which respond differently during steaming—I’ve found that lower temperatures and a gentler swirl can help achieve a smoother microfoam. Has anyone noticed similar differences with other plant milks? It often feels like a small tweak can make a big difference in texture, but troubleshooting that persistent large bubble problem can be tricky. I’d love to hear what techniques others use to maintain consistency when working with different milk types and equipment—sharing tips like these really helps improve all our microfoam skills.
Reading about your microfoam journey really inspired me. I completely agree that patience and attention to detail are essential in developing that velvety texture. One thing that has helped me over time is paying close attention to the milk’s freshness; I’ve found that fresher milk yields better microfoam with finer bubbles. Also, I’ve been experimenting with lower steaming temperatures, especially with plant-based milks, to prevent large bubbles. Sometimes, a gentle tap on the pitcher after steaming helps to break any larger bubbles that might have formed, leading to a more uniform microfoam. Have others tried this method? I’d love to hear what techniques you use to troubleshoot persistent issues, especially regarding alternative milks and equipment quirks. It’s fascinating how small adjustments—like the pitcher tilt or steam pressure—can dramatically improve the microfoam. The community’s shared tips are truly invaluable for refining our craft.