
Ultimate Milk Frother & Steamer Tips for Perfect Latte Art
My First Encounter with a Milk Frother & Steamer: A Coffee Awakening
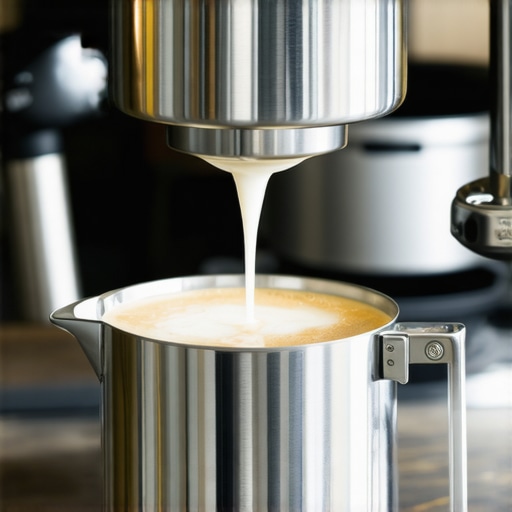
I’ll never forget the first time I tried using a milk frother. It was a lazy Sunday morning, and I was determined to elevate my coffee game. As I gently steamed the milk and watched the microfoam form, I realized I was onto something special. That initial experience sparked my obsession with perfecting my latte art and understanding the nuances of steam pressure and temperature. Since then, I’ve experimented with various techniques, discovering that the right tools and tips can truly transform your coffee experience.
Why I Believe in the Power of Quality Milk Frothers & Steamers
Having tried several models, I’ve come to appreciate that not all milk frothers are created equal. A high-quality steamer can produce creamy, smooth microfoam that’s essential for latte art. I’ve learned that paying attention to the steam wand’s position and the milk’s temperature makes all the difference. For instance, a good steamer gently heats the milk without scalding it, allowing for that silky microfoam that holds its shape when creating designs. I often refer to expert guides, like the Master Microfoam Milk Steamer Hacks, to refine my technique and achieve barista-quality results at home.
What’s the Secret to Flawless Latte Art?
From my experience, the secret lies in mastering microfoam creation and pouring technique. The microfoam must be velvety and glossy, which requires the right temperature and consistent steaming. Once I got the hang of steaming milk to the perfect temperature—around 140°F—I was able to create more intricate patterns. It’s also crucial to pour with confidence and control, gradually forming the design. I recommend practicing simple hearts and rosettas before progressing to more complex art. If you’re serious about perfecting your latte art, I suggest exploring dedicated tutorials like Ultimate Guide to Milk Steamer & Frother Tips.
How Can I Achieve Microfoam That Lasts and Looks Stunning?
Achieving lasting microfoam involves controlling the steaming process carefully. It’s vital to not overheat the milk, as high temperatures can break the foam and make it less stable. I’ve found that using a thermometer helps maintain optimal temperature. Additionally, incorporating the right amount of air during steaming creates denser, more stable microfoam. For tips on perfecting this, I often revisit resources like Best Milk Frothers & Steaming Tips for Microfoam. Sharing my progress and challenges with fellow coffee enthusiasts has also been invaluable—so don’t hesitate to comment below or join online forums.
If you’re passionate about elevating your coffee craft, I invite you to explore more expert insights and share your journey with others. After all, mastering milk frother & steamer techniques is a rewarding adventure—one that transforms your daily coffee into a personal masterpiece.
Unlocking the Nuances of Microfoam: What Do Top Baristas Know?
Creating microfoam that rivals professional baristas requires more than just turning on your milk steamer; it’s about understanding the subtle dance of temperature, air incorporation, and steam wand positioning. Many enthusiasts overlook how crucial the angle and depth of the steam wand are during steaming, which can significantly influence the quality of microfoam. For instance, positioning the wand just below the surface of the milk allows air to be drawn in gently, creating those tiny, stable bubbles essential for a velvety texture. As you learn to control this process, you’ll notice a marked improvement in the microfoam’s consistency and longevity.
How Can I Fine-Tune My Steaming Technique for Consistent Microfoam?
One effective method involves maintaining a steady hand and paying close attention to the sound of the steam. A steady hissing sound typically indicates optimal steam pressure, while fluctuations can lead to uneven foam or scalding. Using a thermometer to monitor the milk’s temperature, ideally around 140°F (60°C), ensures you don’t overheat, which can degrade the foam’s stability. Additionally, integrating microfoam techniques from trusted guides like Master Microfoam Milk Steamer Hacks can provide advanced tips to refine your approach. Consistent practice with these nuances helps develop an intuitive feel for the perfect steam pressure and timing, leading to professional-quality microfoam every time.
Why Is Temperature Control So Critical for Microfoam Perfection?
Temperature control plays a pivotal role in microfoam stability. Too hot, and the foam collapses; too cold, and the milk won’t develop that silky texture. As I’ve experimented, keeping the milk at a precise temperature not only enhances microfoam but also preserves the milk’s natural sweetness and aroma. Using a thermometer can be a game-changer, especially when steaming larger quantities or multiple drinks. This precision allows for better control over air incorporation and helps prevent the dreaded thin or overly dense foam. For more detailed insights, I recommend exploring Ultimate Guide to Milk Steamer & Frother Tips, which emphasizes temperature’s critical role in microfoam mastery.
How Do Different Milk Types Affect Microfoam Quality?
Milk type is more influential than many realize. Whole milk generally produces richer, creamier microfoam, while skim milk tends to create denser, more stable foam due to its higher protein content. Plant-based alternatives like almond or oat milk vary widely in how they froth; some brands are formulated specifically to produce microfoam suitable for latte art. Experimenting with different milk types helps you understand their unique behavior under steaming conditions. For example, oat milk often requires slightly longer steaming and different positioning of the steam wand to achieve the best microfoam. Learning these nuances can elevate your coffee craft and help you adapt techniques across various milk options. For tailored advice, check out Creamy Microfoam Magic.
If you’re eager to elevate your microfoam skills further, I encourage you to share your experiences or ask questions below. Additionally, exploring advanced tutorials like Unlocking Latte Art Potential can provide deeper insights into perfecting your craft. Remember, mastery comes through patience, practice, and a willingness to learn from each steaming session—your perfect microfoam awaits!
Beyond the Basics: Embracing the Nuances of Microfoam Mastery
Every time I delve deeper into the art of milk steaming, I realize there’s an intricate dance of factors that influence microfoam quality. It’s not just about turning on the steamer and hoping for the best; it’s a meticulous craft that demands attention to detail and a willingness to experiment. I recall countless mornings where subtle adjustments—like altering the angle of the steam wand or tweaking the milk temperature—made the difference between a good microfoam and a truly exceptional one. The more I learn, the more I appreciate how tiny nuances can elevate your latte art from simple hearts to complex rosettas or tulips, rivaling those crafted by seasoned baristas.
For instance, I’ve found that positioning the steam wand just below the milk’s surface during the initial air incorporation phase is crucial. This technique allows tiny bubbles to form more uniformly, resulting in that silk-like microfoam that holds its shape beautifully. As I progress, I also pay close attention to the sound of the steam—steady, hissing sounds typically indicate the right pressure, while fluctuations can suggest issues like uneven heating or air intake problems. Incorporating these subtle cues into my routine has been transformative.
Moreover, I’ve experimented with different milk types and brands, discovering that each responds uniquely to steaming techniques. Whole milk tends to produce richer microfoam with a velvety texture, but plant-based alternatives like oat or almond milk offer exciting possibilities once you understand their quirks. Some brands of oat milk, for example, require a slightly longer steaming time or a different wand angle to achieve optimal results. This exploration has been both challenging and rewarding, revealing that microfoam mastery is a continuous journey of learning and adaptation.
In my quest for perfection, I also leverage expert resources like Master Microfoam Milk Steamer Hacks. These guides have provided invaluable insights that complement my hands-on practice, helping me troubleshoot issues and refine my technique. Sharing my experiences in online forums has also opened doors to new ideas and feedback from fellow enthusiasts, fostering a community of continuous improvement.
One challenge I often face is ensuring that microfoam remains stable and glossy for the duration of pouring. To combat this, I focus on controlling the steaming temperature precisely—around 140°F (60°C)—and avoiding overheating, which can cause the foam to collapse or become grainy. Using a thermometer has become an essential part of my process, enabling me to maintain consistency across multiple drinks.
If you’re serious about elevating your microfoam skills, I encourage you to embrace these advanced techniques and share your journey. Every subtle adjustment, every experiment with different milk types, and every resource you explore builds your expertise. Remember, the path to microfoam mastery is ongoing, and each step brings you closer to creating latte art that truly impresses. Dive into the world of expert tutorials, join discussions, and most importantly, enjoy the process of learning and perfecting your craft. Your perfect microfoam awaits—are you ready to take it to the next level?
Refining Your Microfoam: The Role of Milk Composition and Freshness
While mastering the steaming process is crucial, the choice of milk significantly influences the quality of microfoam. Freshness is a key factor; fresher milk tends to produce more stable and velvety microfoam due to higher protein content. Whole milk generally yields richer foam, but I’ve found that experimenting with different brands and fat contents can unlock surprising results. For example, some ultra-pasteurized milk may foam less effectively because of protein breakdown during processing. Additionally, plant-based milks like oat or soy milk require tailored steaming techniques—such as adjusting the steam wand angle or steaming duration—to achieve optimal microfoam. Understanding these nuances allows for greater consistency and creativity in latte art. For deeper insights on selecting and preparing milk, see Creamy Microfoam Magic.
How Do Advanced Steaming Techniques Elevate Microfoam Stability?
Beyond basic steaming, advanced techniques like the ‘stretch and roll’ method can significantly enhance microfoam stability. This involves initially stretching the milk to incorporate air, then rolling the milk to develop a uniform, glossy microfoam. Maintaining a consistent temperature around 140°F (60°C) during this process is vital—too hot, and the microstructure degrades; too cold, and the foam lacks creaminess. I often use a digital thermometer to monitor this precisely, especially when working with different milk types. Additionally, controlling the steam wand’s position—keeping it just below the surface during the initial phase and deeper during the rolling stage—can make a substantial difference. These techniques demand practice but reward with microfoam that holds intricate latte art designs longer and more reliably. For an in-depth tutorial, I recommend exploring Mastering Milk Frother Techniques.
What Are the Secrets to Achieving Microfoam That Lasts During Pouring?
Ensuring your microfoam remains stable during pouring involves not only precise steaming but also proper handling afterward. After steaming, I gently tap the milk pitcher on the counter to eliminate larger bubbles and swirl it to integrate the microfoam evenly. Keeping the milk at the right temperature prevents foam breakdown during pouring, which is critical for complex latte art like rosettas or tulips. Using a thermometer to maintain around 140°F (60°C) helps prevent over-foaming or thinning out the microstructure. Additionally, pouring with a steady, controlled motion—starting from a higher point and gradually lowering—allows the microfoam to settle into beautiful patterns. Practicing these subtle steps consistently elevates your microfoam’s resilience and visual appeal. For comprehensive tips, visit Ultimate Guide to Milk Steamer & Frother Tips.
Can Microfoam Be Tailored for Different Artistic Styles?
Absolutely. The texture and density of microfoam can be manipulated to suit various latte art styles. For intricate designs like free pouring tulips or complex rosettas, a velvety, glossy microfoam that flows smoothly is essential. Conversely, denser microfoam may be preferable for stenciling or creating textured effects. Achieving these variations starts with adjusting the air incorporation during steaming—more air yields lighter foam, while less results in denser microfoam. The temperature also plays a role; slightly cooler milk might produce a thicker foam suitable for certain techniques. Experimenting with different steaming parameters and milk types allows you to develop your unique artistic signature. For inspiration and advanced techniques, explore Unlocking Latte Art Potential.
Engage with My Journey to Microfoam Excellence
Delving into advanced microfoam techniques has been a transformative journey, blending science, art, and patience. Each adjustment—be it the angle of the steam wand, the milk’s temperature, or the pouring angle—brings new possibilities and challenges. I encourage you to share your experiences or ask questions about specific issues you encounter. Together, we can explore innovative solutions and elevate our craft. For personalized guidance or to discuss your microfoam adventures, visit Contact Us. Remember, mastery is an ongoing process, and every step forward sharpens your skills and deepens your appreciation for the art of microfoam.
Things I Wish I Knew Earlier (or You Might Find Surprising)
Mastering Milk Temperature
One surprising thing I learned over time is how critical milk temperature is. Initially, I thought just steaming until hot was enough, but I realized that keeping it around 140°F makes a huge difference in microfoam quality. Using a thermometer was a game-changer for me, helping to avoid over- or under-heating, which can ruin the microfoam texture and stability.
The Angle of the Wand Matters
Many beginners overlook how much the steam wand’s position influences microfoam. I found that positioning it just below the milk’s surface during the initial phase creates finer bubbles, resulting in velvety microfoam. Adjusting the angle slightly can dramatically improve the microfoam’s consistency, which is something I wish I had experimented with earlier.
Milk Type and Freshness
Fresher milk generally produces better microfoam because of higher protein content. I experimented with different brands and found that ultra-pasteurized milk often fared worse, producing less stable foam. Trying plant-based milks like oat or almond requires different techniques, but I was amazed at how their behavior varies and how tailoring the steaming process can yield excellent results.
Practice Makes Perfect
There’s no substitute for consistent practice. I used to get frustrated when microfoam wasn’t perfect, but I learned that small adjustments and patience helped me improve. Watching tutorials and reading guides, like the ones from Master Microfoam Milk Steamer Hacks, provided invaluable tips that I incorporated into my routine.
The Sound of Steaming
Listening to the sound during steaming is more important than I initially thought. A steady hissing sound indicates proper pressure, while fluctuations suggest issues. Over time, I learned to trust my ears and develop a feel for when the milk is perfectly steamed, which has helped me achieve more consistent microfoam.
Resources I’ve Come to Trust Over Time
- Espresso Tech Guide: Their detailed tutorials and expert tips on milk steaming have been my go-to resource for refining my technique. The guides are comprehensive and easy to follow, making complex concepts accessible.
- Barista Hustle: This platform offers in-depth articles and courses on all things coffee, including microfoam mastery. I appreciate their science-backed approach and professional insights that elevate home barista skills.
- Home-Barista Forums: Engaging with fellow enthusiasts has been invaluable. Sharing experiences and troubleshooting with a community of passionate coffee lovers keeps me motivated and learning.
- Specialty Coffee Association (SCA): Their publications and workshops provide authoritative knowledge on coffee techniques, including microfoam and steaming precision. I recommend their resources for serious enthusiasts looking to deepen their understanding.
Parting Thoughts from My Perspective
Mastering microfoam with a milk steamer is both an art and a science that rewards patience and experimentation. From understanding the importance of milk temperature and wand positioning to trusting your senses and practicing regularly, every step brings you closer to creating latte art that’s truly impressive. The journey of learning these nuances has deepened my appreciation for the craft of coffee, transforming simple mornings into moments of creative expression. If this resonated with you, I’d love to hear your thoughts or experiences—sharing your journey can inspire others and help refine your skills even further. Remember, every great barista started as a beginner, so enjoy the process and keep pouring your passion into each cup.
Reading this post really resonated with my own journey into mastering microfoam. I vividly remember my initial frustration when my microfoam would either collapse or become aerated unevenly. What truly made a difference for me was focusing on milk temperature, aiming to stay around 140°F, and paying close attention to the position and angle of the steam wand. I also discovered that the type of milk plays a crucial role; I find whole milk tends to give me the best, velvety microfoam, though I’ve had success with oat milk by adjusting my technique.
One thing I’d love to hear from others is—do you have any tips for maintaining microfoam stability during lengthy pouring sessions or busy mornings? My microfoam sometimes starts to break down if I wait too long before pouring or if I get distracted. Would love to hear your experiences or advice on keeping that microfoam silky and glossy until the very last pour! This ongoing learning process makes me appreciate the science behind a perfect shot even more.
I really appreciate the detailed insights shared about mastering microfoam, especially the attention to temperature control and wand positioning. From my own experience, I found that it’s equally important to consider the type of milk and its freshness. I’ve noticed that ultra-pasteurized milk tends to foam less effectively, which can be frustrating during busy mornings. Trying fresh, room temperature milk helps produce more stable and velvety microfoam, making it easier to maintain during longer pouring sessions. Also, I’ve started pre-warming my pitcher slightly, which seems to help in keeping the microfoam consistent and glossy longer. When working under time constraints, I’ve found that a gentle tap or swirl after steaming can help stabilize the foam and reduce breakage. For those struggling to keep their microfoam intact—do you have any favorite techniques for slowing down or preserving foam quality during extended pourings or busy hours? I’d love to hear how others tackle this issue.
Reading this post really took me back to my early days of experimenting with milk frothing. I remember all the little nuances I had to learn—the positioning of the steam wand, controlling the temperature, and even choosing the right milk type. I found that a lot of my beginner struggles came down to temperature management; keeping the milk just below 140°F made a huge difference in microfoam quality and stability. Recently, I’ve been experimenting more with oat milk since I prefer plant-based options, but I’ve noticed it sometimes needs a slightly different approach to steaming. Do others here find that different milk types respond differently under the same steaming techniques? I’d love to hear your tips for customizing your process based on milk choice! It’s so rewarding when you finally get that silky microfoam that holds up perfectly during pouring—really elevates the whole coffee experience.
This post really captures how crucial the initial experience was for me when I first started experimenting with milk steaming. I vividly remember spending hours trying to perfect the microfoam, and it felt so rewarding when I finally achieved that silky, glossy texture. I agree with the emphasis on milk temperature; keeping it around 140°F makes such a difference in ease of microfoam creation and stability. One thing I found helpful was pre-warming my pitcher slightly, which seems to help in maintaining temperature consistency during steaming. I always wonder, how do others deal with the challenge of maintaining microfoam quality when transitioning from steaming to pouring, especially in a busy kitchen environment? Does anyone have tried-and-true tips for keeping that microfoam as stable and glossy as possible for longer periods? I’d love to hear your strategies or techniques that have worked well for you.
Reading about your initial encounter with the milk frother really brought back memories of my first attempts at steaming milk. That moment of watching the microfoam form was truly magical and ignited my passion for perfecting latte art. I completely agree that the right tools make all the difference—especially a good-quality steam wand that allows precise control over pressure and temperature. One challenge I still face is maintaining microfoam consistency when preparing multiple drinks in quick succession. I’ve started using a thermometer and warming my pitcher beforehand, which helps, but I’d love to hear from others—how do you keep your microfoam stable during busy mornings without sacrificing quality? Also, I’m curious if anyone has tips for preventing microfoam from breaking down during extended pouring or if there are specific techniques to revive slight inconsistencies. Always eager to learn more—thanks for sharing your journey and insights in this post.