
Ultimate Guide to Milk Frother & Steamer Tips for Flawless Latte Art
It was a morning like any other, but as I reached for my milk frother, I faced a familiar, frustrating dilemma. Every time I tried to create that perfect, creamy microfoam for latte art, it either got too hot, too frothy, or just plain dead. Honestly, I remember the lightbulb moment when I finally realized that my biggest hurdle wasn’t the equipment itself—it’s how I used it. If you’ve ever felt that sting of disappointment when your latte art doesn’t turn out as you imagined, you’re not alone. I promise, there’s a way to turn that frown into a beautiful heart or rosette.
Why the Right Milk Frother & Steamer Trust Matters
When I first started making lattes at home, I thought a basic milk frother would do the trick. Spoiler: it didn’t. I learned that achieving café-quality microfoam requires understanding the nuances of your equipment, whether it’s a handheld frother or a full-sized steam wand. Proper technique not only elevates the flavor but transforms your drink into a canvas for stunning latte art. This isn’t just about aesthetics; it’s about confidence. Once I embraced the proper tips, my coffee mornings became a joy, and friends kept asking me to craft their drinks.
But how do you avoid common pitfalls and get consistently gorgeous foam? That’s what we’re about to explore. By the end of this guide, you’ll know exactly how to harness your milk steamer or frother to achieve that velvety, glossy microfoam every time. Curious if your current method is holding you back? I bet some simple tweaks could make all the difference.
Is Flawless Latte Art Really Achievable With Any Equipment?
Early on, I made the classic mistake of assuming that you need expensive, commercial-grade machinery to craft latte art. It’s a misconception I had when I started, and I paid for it with lumpy, inconsistent microfoam. I wish I’d known then what I know now—that even budget-friendly tools, if used correctly, can produce stunning results. According to coffee experts, mastery often comes down to technique rather than gear alone. To build that confidence and avoid costly mistakes, understanding your device is crucial. For a comprehensive look at the essential skills, check out this detailed guide. Now, let’s dive into how you can tweak your approach and start creating latte art masterpieces, starting with the most critical component — your milk.
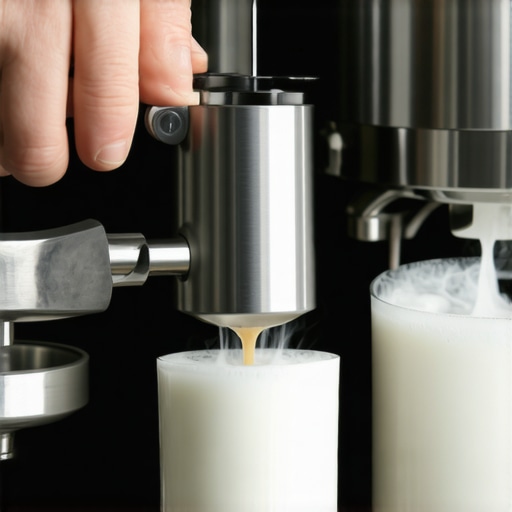
Get Your Milk at the Right Temperature
Start by heating your milk to around 150°F (65°C), just below boiling point. Use a thermometer for precision; milk that’s too hot will lose its microfoam quality, while too cold won’t produce enough froth. I once skipped this step, and my foam ended up flat. Using a thermometer turned that around, giving me the perfect base for latte art. Check out this guide for detailed temperature tips. Ensure your milk is fresh and cold; this helps create a stable microfoam that integrates smoothly with your espresso.
Practice Stationary and Motion Techniques
Hold your frothing jug steady in one hand while you begin steaming. Position the steam wand just below the milk surface, creating a gentle whirlpool. This circulation develops microbubbles, forming a creamy foam. I remember my first attempt, I moved the jug too much, and the foam was chunky. Practicing the steady hand and slight movement significantly improved my results. The goal is to stabilize the foam’s texture and avoid large bubbles. For intricate microfoam control, see this resource. The whirlpool should be ongoing without overexposing the milk to heat, maintaining a consistent texture.
Whisk and Aerate with Precision
Once the milk reaches the correct temperature, turn off the steam wand and gently tap the jug on the counter to burst any large bubbles. Swirl the milk to integrate the foam and create a glossy, velvety texture. I once over-whisked, and the microfoam became too airy, ruining my latte art. By gently swirling, I restored the smoothness needed for pouring. Aim for a shiny, paint-like consistency—thick enough to hold your designs but fluid enough to pour. For more advanced techniques, explore this guide. Proper aeration ensures the foam sticks to the espresso, making your patterns crisp and clean.
Pour with Confidence and Technique
Begin by pouring slowly from a height, allowing the microfoam to sink into the espresso. As the cup fills, start pouring closer to the surface and increase speed. Use wrist movement to draw patterns, like hearts or rosettes. I remember my early attempts; slow, hesitant pouring smeared my designs. Practicing steady wrist flicks and controlled pouring, I eventually created sharp, defined latte art. The key is to maintain a steady hand and consistent flow. For professional tips, read this article. With patience, your designs will become more intricate and confident, transforming your morning coffee into a work of art.Many home baristas operate under a set of misconceptions regarding milk steaming, frothing, and latte art that can sabotage their efforts before they even begin. While beginners often blame their equipment or look for complex techniques, the truth lies in understanding nuanced factors that are frequently overlooked. Let’s start by busting a widespread myth: that expensive machinery guarantees superior microfoam. In my extensive experience, even affordable milk frothers, if used with the correct technique, can produce cafe-quality microfoam. The key is mastering the subtleties of temperature, aeration, and pouring method, which are often more influential than the machine’s price tag. To hone these skills, consider deepening your knowledge through resources like this specialized guide.Maintaining your milk steamer and frother is crucial to consistently achieving smooth, glossy microfoam. First, always descale your equipment regularly, especially if you notice a decrease in steam power or foam quality. Using a descaling solution recommended by your device manufacturer helps prevent mineral buildup that can hinder steam pressure and heat distribution. Personally, I incorporate a monthly descaling routine, which has significantly extended my equipment’s lifespan and performance. For detailed guidance, visit this resource. Additionally, always clean your steam wand or frother after each use to avoid milk residue that can cause blockages or bacterial growth. Use a damp cloth to wipe the steam tip immediately after steaming, and run it briefly in steam mode to flush out any leftover milk.
Investing in high-quality tools is another way to ensure long-term success. I recommend a reliable digital thermometer to monitor milk temperature precisely—never guess when your milk hits the ideal 150°F (65°C). This small investment can drastically improve your microfoam consistency. I personally use the digital thermometer from XBrand, which offers quick readings and durability.
When it comes to scaling your coffee craft, automation can save time and improve uniformity. A semi-automatic milk steamer with programmable temperature and steam output allows you to focus more on pouring techniques and latte art designs. As I look forward, I predict more home baristas will adopt smart, connected equipment that tracks usage and suggests maintenance schedules, reducing the risk of equipment failure.
How do I keep my equipment in top shape over time?
To keep your milk steamer or frother functioning optimally, establish a regular cleaning schedule tailored to your usage frequency. For frequent use, I recommend cleaning the steam wand with a specialized cleaning solution weekly, and doing a full descaling every 2-3 months. This proactive approach prevents mineral deposits and milk build-up, which can impair steam quality. Additionally, check seals and gaskets periodically; replacing them when worn ensures consistent pressure and heat. Following these practices, backed by expert advice like this detailed guide, will prolong your equipment’s lifespan and help you produce cafe-quality microfoam day after day.
Over the years of experimenting with latte art, I discovered that the tiniest details often make the biggest difference. One lesson that truly changed my approach was realizing that precision in technique trumps high-end equipment every time. Small adjustments like maintaining consistent steam pressure or paying close attention to milk temperature can elevate your microfoam from average to stunning. Remember, even the most beautiful latte art is only as good as the microfoam that forms the canvas. Embracing humble tools with mastery can unlock your full creative potential, transforming your morning coffee routine into an artful ritual.
I completely relate to the frustration of getting that microfoam just right. When I first started practicing latte art, I realized that the key was really in mastering the steaming technique rather than relying on high-end equipment. Using a simple thermometer to monitor milk temperature made a huge difference for me—keeping it consistently around 150°F really improved the microfoam quality. I also found that gentle swirling after steaming helps integrate the foam smoothly with the espresso, giving me cleaner pours. I’m curious, has anyone tried using alternative steaming tips or tools to improve microfoam? I’ve wondered if certain nozzles or wand attachments could produce a more stable microfoam for intricate designs.
This post really hits home for me, especially the part about focusing on technique over fancy equipment. When I started experimenting with latte art, I found that even a basic milk frother could produce amazing microfoam once I paid close attention to the details. For example, maintaining a steady hand while steaming and always using a thermometer has been a game-changer. I’ve also started experimenting with different pouring angles and speeds, which seem to influence the sharpness of my designs. One thing I’d love to hear from others is their approach to troubleshooting microfoam issues—like what’s the best way to fix large bubbles or flat foam if you’re already at the right temperature? I believe that mastering these small nuances can really elevate your coffee game without needing the most expensive gear. How do you all ensure consistency, especially when you’re trying to replicate a specific pattern? Would be great to exchange tips on refining our technique and troubleshooting common pitfalls.
This post resonated with me because I’ve also faced those frustrating moments trying to perfect microfoam. I used to think that having the latest steam wand or frothing device was the key, but I quickly learned that technique and attention to detail make all the difference. I’ve started experimenting with gentle, consistent motions and monitoring my milk temperature closely, which helped me produce more stable microfoam for latte art. One tip that worked for me was adjusting my steam wand’s position slightly higher or lower to find that sweet spot for microbubble creation. Have others here experimented with different steam wand attachments or even non-traditional tools to improve microfoam stability? I’d love to hear what has worked for others, especially those who have managed to turn budget equipment into professional-looking foam. Ultimately, I agree that patience and practice are top ingredients—more than any fancy gadget. Curious to know, do you have any specific routines or rituals for honing your milk steaming technique regularly?
Reading this post really resonated with my own experience—I’ve often struggled with getting that perfect microfoam, especially when my milk gets too hot or the texture isn’t smooth enough. The key revelation for me was realizing how crucial the steaming technique is over the equipment itself. I started paying closer attention to positioning the steam wand and maintaining consistent motion, which made a huge difference. I also began using a thermometer regularly to keep the milk at that ideal 150°F, and that took a lot of guesswork out of the process. One thing I wonder, though, is how others deal with larger bubbles or uneven foam that sometimes occurs despite following all the right steps. Do you find that certain types of milk or specific steaming routines help in reducing these issues? I’d love to hear more tried-and-true tips for troubleshooting these common microfoam challenges. Achieving that silky texture feels so rewarding, and I believe a few small adjustments can make all the difference in our latte art consistency.