
How to Achieve Flawless Microfoam with Milk Steamer & Frother Tips
Ever had that moment where you proudly prepare your morning coffee only to be disappointed by the froth? I used to think that creating perfect microfoam was reserved for baristas with fancy tools and years of experience. My first attempts were more like bubbly milk disasters—lumpy, uneven, and far from that silky, smooth microfoam I craved. It was frustrating, to say the least. But then, I had a lightbulb moment that changed everything. I realized that achieving microfoam perfection isn’t about luck or expensive equipment alone; it’s about understanding the right techniques and avoiding common mistakes. If you’ve ever felt like your milk frother is working against you or that your steamer just can’t produce that velvety texture, I get you. I’ve been there, and I want to help you skip those pitfalls. Today, I’ll share practical tips and insights that will make your microfoam as creamy and luscious as a professional’s in no time. Ready to transform your coffee game? Let’s dive into what really makes the difference.
Why Microfoam Matters More Than You Think
Microfoam isn’t just about aesthetics; it’s the secret to a balanced, flavorful coffee experience. When done right, it enhances the aroma, adds a luxurious texture, and even affects how the flavors meld. According to a study published by the Specialty Coffee Association, microfoam can actually influence the perceived sweetness and richness of your brew. That’s why mastering your milk steamer and frother is worth the effort. But before we get into the nuts and bolts, I want to address a common concern that might be holding you back.
Is Achieving Microfoam Actually Worth the Hype?
Absolutely. I remember dismissing microfoam as just a fancy garnish—until I realized how much it elevates every sip. My early mistake was thinking that any froth would do, but I soon learned that the secret lies in the technique. The truth is, many of us give up too soon or use the wrong tools, which leads to disappointment. If you’ve faced this struggle, you’re not alone. That’s why I recommend starting with the basics and gradually refining your method. Want to avoid the common pitfalls that ruin microfoam? Check out this guide for expert tips on perfecting your technique.
Now that you know why microfoam is worth mastering, let’s look at what you might be doing wrong and how to fix it. Trust me, with a few adjustments, your milk will become the silky canvas for stunning latte art and a more enjoyable coffee experience overall. Ready to get started? Let’s go through the essential steps that will elevate your microfoam game and turn your kitchen into a mini coffee shop.
,
Pick the Right Equipment and Prepare Your Milk
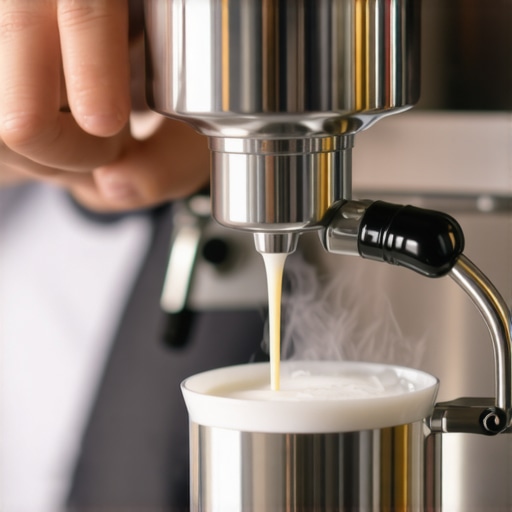
Start by selecting a quality milk frother or steam wand that suits your skill level. I recommend a reliable milk steamer with adjustable temperature control. Before frothing, always use cold, fresh milk—whole milk tends to create richer, creamier microfoam. Pour the milk into your pitcher, filling it no more than halfway to allow room for expansion and movement during steaming.
Perfect Your Technique with Consistent Motion
Think of steaming milk like drawing a smooth, continuous swirl in a bowl. Submerge the steam wand just below the milk surface and turn it on. As the milk warms, gently tilt and swirl the pitcher to encourage even heating and incorporation of air. I once made the mistake of keeping the wand still, which resulted in uneven foam. Moving the pitcher in a circular motion helps create fine, uniform microbubbles that feel velvety to the touch. For detailed guidance, check out this comprehensive guide.
Control Air Intake and Temperature
Getting the right amount of air is critical. When you hear a gentle hissing sound, it means air is blending into the milk, forming tiny bubbles. Once the milk reaches around 140°F (60°C), turn off the steamer. Overheating can cause the foam to collapse or develop large bubbles, ruining the silky texture. Use a thermometer if you’re unsure or learn to gauge temperature by feel. During my first few attempts, I ignored temperature and ended up with burnt-smelling milk—learning to monitor it made all the difference.
Achieve the Ideal Microfoam Texture
Once the steaming is complete, tap the pitcher on the counter to break any larger bubbles and swirl it to integrate the foam into the milk. Look for a shiny, glossy surface with a microfoam that is smooth, velvety, and free of large bubbles. Practice makes perfect—initially, I’d get frothy milk with big bubbles, but consistent technique transformed my results. For advanced tips, explore this resource.
Pour with Confidence to Create Latte Art
The pouring technique is just as important as steaming. Hold the pitcher high above the cup and pour steadily, then lower it as you start to create patterns. A steady hand and consistent flow help in forming beautiful latte art. I recommend practicing simple hearts or rosettas to build confidence. Remember, the key is control and patience—rushing can disturb the microfoam’s delicate structure.
With these proven steps, you’ll see your microfoam improve dramatically. Remember, each attempt teaches you something new—don’t get discouraged by initial messes. Keep experimenting, and soon you’ll be creating barista-quality microfoam for your home coffee pleasures. For more detailed insights and troubleshooting, visit this article.
Many coffee enthusiasts fall prey to misconceptions that hinder their progress in achieving perfect microfoam. Let’s cut through the noise and dig deeper into what most people get wrong about milk frothing, especially when aiming for that silky, professional-quality microfoam. I’ve seen these mistakes repeatedly, and understanding the nuances can save you time and frustration.
Why Do We Overlook the Temperature’s Role in Microfoam?
It’s a common belief that as long as your milk is hot enough, the microfoam will turn out fine. However, the temperature at which you steam milk greatly influences the texture and stability of the foam. Many beginners ignore this and overheat their milk, leading to larger bubbles and a less velvety finish. Overheating milk above 150°F (65°C) causes proteins to break down, resulting in a grainy or burnt flavor and compromised foam structure. Conversely, steaming too quickly or at too low a temperature can produce inconsistent microbubbles. For an advanced understanding, check out this guide on optimal steaming temperatures.
Have you ever fallen into this trap? Let me know in the comments.
Common Myth: More Air Means Better Microfoam
Many believe that adding as much air as possible during steaming guarantees perfect microfoam. In reality, introducing too much air too early creates large bubbles, making the foam bubbly and uneven. The key is controlling the airflow—adding just enough tiny bubbles to produce a smooth, shiny microfoam. Skillful baristas subtly incorporate air in the initial phase and then focus on texturing the milk without adding more air. This nuanced control distinguishes professional microfoam from amateur attempts.
Interestingly, studies show that microfoam stability depends on bubble size rather than quantity. Smaller bubbles, achieved through precise air incorporation, create that characteristic silky texture. For more insights, explore this resource.
What Advanced Mistake Can Ruin Even the Best Frothing Technique?
An often-overlooked mistake is neglecting the pitcher’s angle and the position of the steam wand. Even with perfect temperature and air control, an improper angle or placement can cause uneven heating and inconsistent foam. For instance, keeping the steam wand too close to the surface can create large bubbles, while too deep can result in uneven heating. The best baristas keep the wand just below the surface, creating a whirlpool effect that promotes uniform microbubble formation. Mastering this angle and motion is crucial for advanced microfoam mastery.
According to expert advice, consistent practice with attention to pitcher positioning makes a significant difference. For detailed techniques, consider reviewing this guide.
Have you ever struggled despite following all the steps? Share your experience below and let’s troubleshoot together!
Maintaining your milk frothing tools is essential to consistently crafting that velvety microfoam every coffee lover dreams of. I personally swear by a few key practices and tools that keep my equipment performing at its best, ensuring every latte art session is smooth and successful. First, I regularly descale my steam wand and milk frother, especially if I notice any reduction in steam power or uneven heating. Using a descaling solution like citric acid or commercial descaler helps remove mineral build-up that can impair performance and affect foam quality. I do this at least once a month, depending on my water hardness, to prevent clogs and ensure optimal operation.
Next, I invest in high-quality cleaning brushes specifically designed for steam wands and milk pitchers. These brushes help remove milk residues that can harden and cause bacterial growth, which may alter the taste and safety of your milk. After each use, I rinse all parts thoroughly and wipe them with a damp cloth to keep everything hygienic and ready for the next session.
For long-term efficiency, I keep a small maintenance kit on hand, including replacement seals and gaskets. Over time, these components wear out, leading to leaks or decreased steam pressure. Replacing them as needed ensures consistent steaming power, which is crucial for fine microfoam creation. I also monitor the steam wand’s tip and replace it if I notice cracks or corrosion, as these imperfections can disrupt airflow and bubble formation.
Thinking about future trends, I believe smart, IoT-enabled frothing devices will become more popular, allowing real-time monitoring of temperature and pressure. This tech integration will make maintenance even easier, alerting you when a part needs replacing or cleaning.
So, how do I maintain my equipment over time? I schedule regular cleaning and descaling sessions, keep spare parts handy, and stay attentive to any changes in performance. This proactive approach not only extends my tools’ lifespan but also ensures every cup of coffee has that perfect microfoam. If you want to dive deeper into advanced maintenance techniques, check out this comprehensive guide to mastering your milk frother’s longevity. Now, I challenge you to try cleaning your steam wand with a descaling solution today and see the difference it makes in your microfoam quality!
What I Wish I Knew When I Started
One of the biggest lessons I learned was that patience and consistency are more important than fancy equipment. Early on, I believed that upgrading my frother would instantly give me perfect microfoam, but I discovered that technique and temperature control matter far more. This lightbulb moment taught me to focus on steady hand movements and monitoring temperature, which transformed my results.
Another insight was that small adjustments make big differences. Slightly changing the angle of the steam wand or the pouring height could turn a bubbly mess into silky microfoam. It’s about developing a feel for the process, not just following a checklist. Practicing deliberately and observing how each tweak affects the foam helped me build confidence and skill.
Finally, I realized that even the best tools require regular maintenance. Descaling my steam wand and cleaning my pitchers kept the equipment performing optimally, ensuring every cup was as good as the last. Sharing these personal lessons has helped me troubleshoot common issues and refine my craft continuously.
My Favorite Resources for Coffee Microfoam
For anyone looking to deepen their understanding, I highly recommend this comprehensive guide. It covers everything from basic techniques to advanced tips, making it perfect for all skill levels. The detailed instructions and troubleshooting advice have been invaluable for me.
Another go-to resource is this article, which dives into optimal steaming temperatures and airflow control. It helped me understand the science behind microfoam and how to manipulate variables for the best results.
Finally, I keep an eye on this resource for ongoing tips on milk steaming techniques and latte art mastery. Staying connected with expert advice keeps me motivated and improving.
Take the Leap and Perfect Your Microfoam Today
Your journey to silky, professional-quality microfoam starts now. With a good understanding of the techniques and a commitment to regular practice, you can turn your home coffee into a café-quality experience. Remember, every expert was once a beginner—so don’t be afraid to experiment and learn from your mistakes. The more you practice, the more natural it will feel to produce that luscious microfoam that transforms your coffee.
What’s the biggest challenge you’ve faced in creating microfoam? Share your experiences below and let’s grow together in this coffee adventure!
Reading this post resonated with my own journey into perfecting microfoam. I used to think that only professional baristas could achieve that silky, smooth texture, but I realized that much of it comes down to technique and patience. I especially appreciated the emphasis on controlling temperature and airflow—these are points I overlooked earlier on. One thing I found helpful was watching YouTube tutorials from barista enthusiasts; their visual demonstrations clarified many concepts that are hard to grasp through words alone. For anyone struggling to get consistent microfoam, I suggest recording your steaming process and reviewing it. Small tweaks in angle or motion can make a big difference. Have others found particular tools or methods effective in maintaining consistent results? I’m curious about different approaches to mastering those delicate microbubbles since it’s such a nuanced skill.
This post hits on so many critical points that often go unnoticed by home baristas. I’ve personally found that heat control is the biggest game-changer. Oversteaming ruins microfoam, and I used to get frustrated when my milk would turn grainy or have large bubbles. Now, I always use a thermometer and make sure not to go above 140°F—works wonders. Also, I’ve started experimenting with different pitchers; wider mouths seem to help me create a smoother whirlpool effect, which improves the microbubble formation. I wonder if others have noticed a difference with certain pitcher shapes or materials? For me, consistency comes down to pre-warming my pitcher and milk, which ensures the temperature stays even during steaming. One challenge I still face is achieving that perfect pour to create latte art—any tips on controlling flow and height from experienced baristas here? I’d love to hear others’ insights or routines for fine-tuning their microfoam for art and taste.
This post really resonated with me, especially the part about controlling temperature and airflow. I’ve struggled a lot with inconsistent microfoam despite having decent equipment. It’s enlightening to realize that technique and patience are more important than having the fanciest frother or steamer. I particularly appreciate the tip about swirling the milk pitcher for uniform microbubbles—simple but effective. I started paying closer attention to my steaming motion, and my results have noticeably improved. I’ve also found that using a thermometer helps me stick to the ideal temperature without guesswork, which makes a big difference. One question I have is about the best pitcher shape; I’ve mainly used standard ones but wonder if wider or narrower mouths impact the microfoam quality. Has anyone experimented with different pitcher designs and noticed a difference? I’d love to hear if folks have found specific shapes or materials that enhance the microfoam process. It’s such a nuanced craft, and sharing experiences helps us all improve.