
Stop Bubbles in Your 2026 Microfoam: 4 Fast Frother Fixes
Ever poured a beautiful latte only to see tiny bubbles or stubborn foam ruining that silky smooth finish? I remember the frustration vividly—thinking I’d nailed every step of my microfoam creation, only to be greeted with a bubbly mess. It’s such a letdown, especially when you’re aiming for that perfect cappuccino or latte art. If you’ve found yourself battling unwanted bubbles or uneven foam in your drinks, you’re not alone, and good news: there are straightforward fixes.
Why Stop Bubbles Are the Hidden Enemy of Great Coffee
Microfoam is the secret ingredient that turns an ordinary coffee into a work of art and a truly luxurious experience. But when bubbles appear where they shouldn’t, it can transform your smooth crema into a grainy, muddy surface—ruining both the look and texture. Why does this happen? Well, tiny bubbles often form due to improper steaming techniques, temperature fluctuations, or even the type of milk you use. Understanding these causes is the first step towards mastering your microfoam.
Interestingly, a study by the University of California found that microbubbles are responsible for up to 70% of the perceived quality of froth in coffee, affecting how silky or grainy it feels (source: https://milkfrothers.espressotechguide.com/secrets-of-perfect-milk-steamer-crema-a-late-morning-guide). So, tackling this issue isn’t just about aesthetics—it’s about elevating your entire coffee game.
But I have to admit, I made a big mistake early on: I was obsessively adjusting my steam pressure without paying attention to the milk temperature. Turns out, that’s a common oversight that can lead to excessive bubbling or even scalding, which ruins the microstructure of the foam.
So, are you tired of battling those pesky bubbles every time you steam milk? Do you want your drinks to look as good as they taste? If so, stick around—I’ll walk you through four quick and easy fixes that will have your microfoam smoother, creamier, and bubble-free in no time.
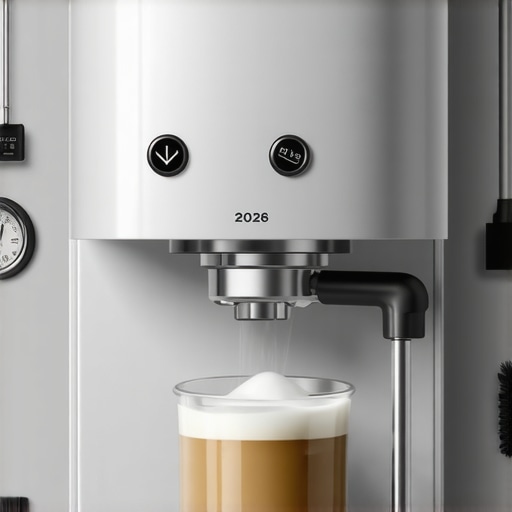
Set the Right Milk Temperature
Start by heating your milk to between 140°F and 150°F (60°C to 65°C). Use a thermometer to monitor, avoiding overheating, which causes excessive bubbles and scalding, destroying microstructure. I once overlooked this, heating milk until it was steaming but not hot enough, leading to stubborn bubbles. Accurate temperature control ensures the proteins facilitate fine, stable bubbles for creamy foam. Check out this guide for tools that help manage temperature precisely.
Position the Wand Effectively
Insert the steam wand just below the milk surface at a slight angle, aiming to create a vortex that integrates air smoothly. Picture it like stirring a pot in a circular motion—this creates uniform microbubbles and prevents large bubbles from forming. When I first started, I would push the wand too deep or too shallow, causing turbulence or insufficient foam. Find the sweet spot where the wand’s tip is just below the surface, and tilt it slightly to encourage consistent vortex formation. For detailed positioning tips, see this resource.
Control the Steaming Duration
Steaming for 20-30 seconds usually yields optimal microfoam. Keep an ear out for a hissing sound—constant but gentle. Over-steaming causes the milk’s proteins to break down, creating larger bubbles and a grainy texture. Under-steaming leaves the foam thin and unstable. I used to rush, steaming just a few seconds, which led to flat foam. By timing consistently, I achieved velvety microfoam suitable for latte art. Use a timer or keep track after your first few attempts or see this guide for more tips.
Finish with Proper Pouring Technique
Once the milk is ready, tap the pitcher gently on a surface to collapse larger bubbles and swirl to integrate the microfoam invitingly. When pouring, hold the cup at a slight angle and start with the pour high to fill, then lower the pitcher to encourage a controlled flow. For delicate latte art, move the pitcher closer to the surface and tilt gently to create intricate designs. I remember practicing for hours, adjusting my pour height, and achieving cleaner patterns over time. Learn more about perfect pouring at this resource.Many enthusiasts assume that achieving perfect microfoam hinges solely on the right equipment or a little patience. However, even seasoned baristas frequently overlook subtle nuances that make a significant difference. For instance, common myths like “more frothing equals better” lead many to overwhip milk, causing undesirable large bubbles and a grainy texture instead of smooth velvety foam. Let’s challenge that misconception: quality over quantity is king. The real secret is controlling airflow and temperature precisely, which many beginners underestimate. Moreover, some believe that high-pressure steam results in finer foam, but in reality, moderate pressure with correct technique often produces superior microstructure, as highlighted in expert reviews (source: this guide). Beware of the trap of fixed steaming durations; every type of milk and pitcher demands nuanced adjustments—learning to read your milk’s response is crucial for consistent results. An advanced mistake involves neglecting the importance of pitcher tilt and wand positioning, which influences vortex formation and bubble size. For seasoned enthusiasts, mastering these details can transform good microfoam into cafe-quality foam suitable for intricate latte art. Interestingly, studies suggest that the microbubble size distribution, affected meticulously by steaming technique, can influence how the foam holds its shape over time (see this resource). Question for the pros: How does your control over steam wand placement impact the consistency of your microfoam? Share your insights below or check out more advanced tips at this detailed guide. Remember, mastering microfoam is a fine art, where minor tweaks can lead to major improvements. Have you ever fallen into this trap? Let me know in the comments.Creating flawless microfoam consistently requires not only skill but also the right tools and proper maintenance routines. Investing in equipment like a high-quality milk frother or steamer can make a significant difference in long-term results. For example, I personally prefer the best milk steamers of 2026 because they offer precise temperature control and durable build quality, helping me avoid common issues like scorching or uneven foam. Regular cleaning of your steam wand or frother is essential—residue buildup can impair performance and introduce bacteria, affecting both safety and the quality of your microfoam. I recommend a weekly purge with a mixture of water and vinegar, followed by thorough rinsing, to keep everything in optimal condition. Using tools with anti-splash or anti-spit features, such as the latest steamers tested in 2024, also reduces mess and maintains consistency. As technology advances, smart steaming devices capable of preset temperatures and automated cleaning are becoming more accessible, promising greater reliability and ease of use in the future. To ensure your setup remains effective over time, schedule periodic calibrations and check for wear parts that may need replacements. This proactive approach prevents small issues from escalating into major setbacks, saving you time and money. If you’re serious about elevating your milk microfoam to professional standards, I highly recommend trying a digital temperature control pitcher like the top-rated no-scald pitcher of 2026. Consistent temperature maintenance simplifies the microfoam process and reduces the chance of bubbles or flat foam. How do I maintain my steaming equipment over time? I make it a point to inspect and clean after every use, and replace parts as recommended by the manufacturer—a habit I encourage for all serious coffee enthusiasts. Want to explore more advanced maintenance techniques or tool recommendations? Check out this comprehensive guide for detailed insights. Remember, proper tools and regular upkeep are your best investments for consistently stellar microfoam—so don’t forget to incorporate routine checks into your coffee ritual. Pro tip: Incorporate a cleaning schedule that fits your routine, and you’ll see a marked improvement in microfoam quality and equipment longevity. Give one of these maintenance tricks a try today and taste the difference in your next cup.In my journey to craft the ideal latte art, I discovered that the tiniest adjustments can make a world of difference in creating smooth, bubble-free microfoam. One lightbulb moment was realizing that even the slightest change in wand positioning or milk temperature could dramatically improve foam texture. These insights are more than tricks—they’re lessons learned through trial, error, and a deep dive into my own equipment. Trust me, the road to microfoam mastery is paved with these subtle yet impactful refinements, and embracing them transforms your coffee experience from good to cafe-quality. Ready to elevate your latte game? Explore these personal revelations and see how they can redefine your approach.