
2026 Walnut Milk: 4 Steamer Tweaks for Stable Microfoam
It was a morning like any other, but when I poured my freshly steamed walnut milk into a latte, the microfoam decided to play tricks on me. Instead of the silky, glossy texture I was aiming for, I got a streaky, lumpy mess that couldn’t hold a simple leaf. Frustrated, I realized I wasn’t alone—so many coffee lovers struggle with stable microfoam when steaming plant-based milks like walnut in 2026. The good news? After some trial, error, and genuine curiosity, I discovered four powerful tweaks that can transform your steaming game. Today, I promise to share these secrets so you can enjoy café-quality microfoam at home, no matter your milk choice or equipment. Wondering why your walnut milk refuses to behave? Let’s dive into the reason behind it and how you can fix it effortlessly.
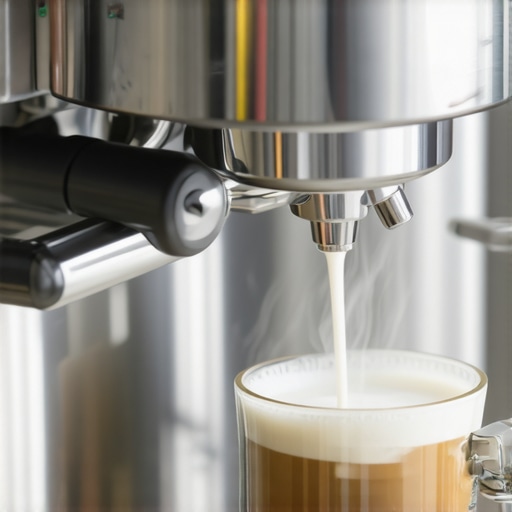
Choose Your Equipment Wisely
Start by selecting a milk steamer or frother capable of producing consistent heat and pressure. An automatic steam wand often yields more stable microfoam, especially useful for tricky milks like walnut. I recall my first attempt with a basic handheld frother; the foam was thin and bubbly, but upgrading to a two-thermostat steam wand transformed my results entirely. For more insights on equipment, see our guide on powerful milk steamers.
Perfect Your Milk Temperature
Preheat Your Milk
Warm the walnut milk gradually to about 140°F (60°C). This temperature promotes optimal microfoam without scorching. I once rushed through steaming and heated my milk too fast; the resulting foam was grainy. Remember, like roasting coffee beans, slow and steady helps develop the best flavor and texture.
Control Your Steaming Pressure
Maintain steady steam wand pressure; too high causes overheating, too low yields weak foam. When I first tried steaming, I noticed my foam was inconsistent because I was pressing too hard on the wand. For detailed pressure tips, explore tips on steaming pressure.
Technique Matters: How to Froth Like a Pro
Position the steam wand just below the milk surface, creating a whirlpool effect. This technique ensures even incorporation of air and heat, resulting in dense, silky microfoam. I remember turning my pitcher at a slight angle, which helped prevent large bubbles—an issue I faced early on. To perfect your pour, check out home microfoam tips.
Achieve Consistency with Pitcher Skills
Choose a pitcher with a narrow spout for better control. When pouring, start from a higher altitude to create a thin stream, then lower for art. I practiced aiming for a clear, steady flow—initially, my latte art was shaky but improved significantly after applying guidance from pours for cleaner latte art.
Refine and Practice Regularly
Microfoam perfection isn’t instantaneous. Keep experimenting with steaming times, pressure, and pouring angles. I spent several mornings adjusting technique, each time noting what changed. Remember, consistency comes from habitual practice—link to more techniques at latte art symmetry drills.
Many enthusiasts assume that mastering milk steaming is simply about having the right equipment or following basic steps. However, there’s a wealth of nuanced techniques and misconceptions that can significantly affect your results. One prevalent myth is that higher pressure always yields better microfoam. In reality, overly aggressive pressure can cause overheating and undesirable large bubbles, which compromise latte art quality. Instead, maintaining a consistent, controlled pressure—often around 1 to 1.5 bar—is key for silky microfoam, especially with plant-based milks like walnut. For an in-depth look at optimal steaming pressures, see our detailed guide on steam wand pressure adjustments. Another common misconception involves the belief that all frothing techniques are universally effective regardless of milk type. Different plant-based milks react differently to steaming; walnut milk, for instance, can be prone to splitting or becoming grainy if not handled properly. Advanced baristas know that preheating the milk slowly and adjusting steaming time based on milk composition makes a massive difference. Beware of the trap of rushing the process or using a one-size-fits-all approach, which often results in streaky or thin microfoam. Have you ever fallen into this trap? Let me know in the comments. Additionally, many think latte art is solely about pouring speed and angle. While those are important, the real secret lies in pitcher technique—specifically, pitcher tilt and swirl motion during steaming, which influences the evenness and creaminess of microfoam. Practicing these subtle movements can elevate your latte art from mediocre to professional-looking. For guidance on perfect pitcher techniques, consult our post on mastering pitcher control. Moreover, one obscure but critical detail is the impact of residual water in your steaming equipment. Moisture buildup can lead to inconsistent steam flow and streaky microfoam, especially problematic when frothing challenging plant-based milks. Regularly purging and descaling your steamer prevents this issue, ensuring stable performance. Do you regularly maintain your steamer? It’s worth the effort for those perfect microbubbles. Remember, achieving exceptional milk microfoam and latte art isn’t just about pressing buttons—it’s about understanding these nuanced factors and avoiding common pitfalls. Want to explore more advanced tips? Check out our comprehensive resources on secrets of perfect microfoam and reach out for expert advice. Mastery is a journey—enjoy every step and avoid the traps that hold many back.Maintaining your milk steaming equipment is crucial for consistent, café-quality microfoam. Personally, I rely on a high-precision digital thermometer, such as the digital thermometer from CafeMaster, to monitor milk temperature precisely. This allows me to avoid overheating and ensures microfoam stays silky and stable over time. Regular descaling is another vital maintenance step; mineral deposits can clog the steam wand and destabilize pressure, leading to streaky foam. I recommend descaling at least once a month with a mixture of white vinegar and water, followed by thorough rinsing, as detailed in our comprehensive guide.
Investing in quality tools like a sturdy pitcher with a narrow spout helps develop better pour control, which is essential for repeatable latte art. Additionally, a dedicated cleaning brush for your steam wand prevents milk residue buildup that can impair foam quality. As technology evolves, smart steamers with built-in pressure sensors and automatic cleaning cycles are emerging, promising more consistent results with less manual effort. I believe this trend will grow, making microfoam mastery more accessible.
How do I maintain my milk frother and steamer over time?
Regular cleaning after each use is non-negotiable—always flush the wand with steam to clear residual milk, and perform weekly deep cleaning to prevent buildup. Use descaling solutions according to manufacturer instructions, and replace worn-out parts promptly. Doing so extends the device’s lifespan and maintains optimal performance.
For those who want to elevate their microfoam game, I highly suggest trying advanced pitcher tilting and swirl techniques. These small adjustments, though subtle, dramatically improve microfoam consistency and latte art quality. To refine your skills further, check out our guide on mastering pitcher techniques. Remember, the key to long-term success is combining quality tools with diligent maintenance. A well-maintained steamer will reward you with reliable, velvety microfoam every morning. As Dr. David Schomer, a renowned espresso expert, emphasizes, “Consistent cleaning and monitoring pressure are essential for microfoam perfection.” So, grab your brush today and start implementing these maintenance steps to witness how your microfoam improves over time.
Breaking the Mold: Lessons That Changed My Milk Steaming Journey
One of the most surprising insights I uncovered was that microfoam quality isn’t solely dependent on equipment—technique and understanding your milk’s unique behavior play a crucial role. I used to believe that a fancy steamer would solve all my problems, but I learned that mastering subtle adjustments in pressure and timing made a world of difference. Additionally, I discovered that even with professional tools, neglecting regular maintenance like descaling and cleaning would sabotage my efforts, leading to streaky foam and inconsistent results. This realization pushed me to develop a routine that prioritized equipment care, which consistently rewarded me with stable, velvety microfoam. Lastly, I found that patience and experimentation with different plant-based milks, especially walnut, opened new horizons in achieving café-quality microfoam at home. The journey taught me that true mastery is about embracing these nuanced lessons and continually refining your approach.
I totally resonate with the challenges of steaming plant-based milks like walnut. It’s funny how even slight variations in temperature or pressure can make or break the microfoam, especially with tricky milks. I’ve experimented with preheating my milk more slowly and found that it really helps prevent graininess and streaks. Upgrading to an automatic steam wand was a game-changer for me, providing more consistent results. I’m curious—does anyone have tips on adjusting steaming times specifically for walnut milk? Sometimes I wonder if blending different plant milks could optimize foaming stability. I also try to keep my equipment super clean and regularly descale, as I’ve noticed residual water and mineral buildup can really affect the quality of the microfoam. Would love to hear how others maintain their steamers or if they use specific tools to get perfect microfoam every time. It’s such a satisfying process when everything clicks, and I think mastering these smaller adjustments can truly elevate our home barista skills.