
4 Fixes for Bubbles in Your 2026 Soy Milk Microfoam
It was a moment I won’t forget—my carefully poured latte suddenly clouded with unsightly bubbles, ruining what should have been a smooth canvas for latte art. Frustration bubbled up as I realized my microfoam looked more like a fizzy soda than the silky velvet I was aiming for. That lightbulb moment taught me that bubbles aren’t just cosmetic issues; they can sabotage your entire coffee experience.
Why Bubbles in Your Soy Milk Microfoam Can Ruin Your Coffee Day
In the world of coffee enthusiasts, microfoam is everything. Yet, even with the latest 2026 milk frothers, bubbles seem to sneak in and spoil those perfect pours. The truth is, if you don’t fix these tiny air pockets, your latte art may never reach pro levels. Beyond aesthetics, lingering bubbles can affect the texture and flavor, making your drink less enjoyable. According to a recent study by coffee technical experts, microfoam with excessive bubbles tends to collapse faster, reducing the lifespan of your latte art and overall microfoam quality.
Is Fixing Microfoam Bubbles Really Worth the Effort?
Trust me, I used to think that bubbles were just a minor annoyance. Early on, I made the mistake of rushing the steaming process, thinking I could save time. But, that short-cut only made things worse—creating uneven microfoam and more bubbles. The good news? Once I started paying attention to a few key tactics, my foam transformed. If you’re tired of your microfoam resembling a bubbly sponge, stick around. I’ll show you exactly how to banish those bubbles and elevate your coffee game.
Ready to uncover the four fixes that will make your soy milk microfoam smoother, creamier, and bubble-free? Let’s dive into the practical steps that turned my microfoam from inconsistent to cafe-quality and can do the same for you.
Prep Your Milk with Precision
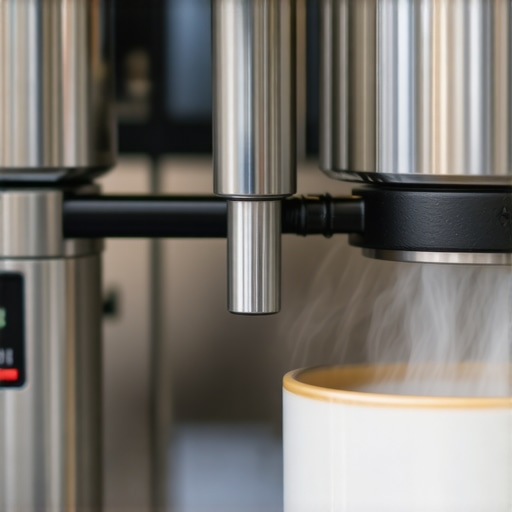
Start with fresh, cold soy milk, which froths better when cold. Use a clean pitcher to prevent contamination that can interfere with foam consistency. Before steaming, gently swirl the milk to combine any separated layers, ensuring uniformity, much like blending paint for a smooth application. When positioning your milk steamer or steam wand, tilt your pitcher slightly to create a whirlpool effect, mimicking a mini vortex, which helps break larger bubbles and creates even microfoam. Practice controlling the distance between the wand tip and the milk surface, keeping it just below the surface to incorporate air gradually without causing turbulence. Early morning, I tried this technique with my old pitcher, and the result was a silky microfoam with minimal bubbles, drastically improving my latte art success.
Control Your Steaming Technique
Use Low-Pressure Settings
Set your milk steamer or frother to low pressure if it has adjustable settings. High pressure can introduce excessive air, resulting in large bubbles instead of fine microfoam. Think of it as trying to inflate a balloon slowly versus rapidly—slow is smoother. During steaming, listen for a gentle hissing sound, indicating controlled, steady air incorporation. If your device sputters or crys, reduce the pressure or pause to adjust. This careful approach prevents over-agitation, which leads to the dreaded foam with bubbles. My first trial with this method was messy; milk spatters and bubbles appeared. But after adjusting the pressure and taking my time, I achieved a dense, bubble-free microfoam, ready for pouring.
Refine Your Technique with Fine-Tuning
Once the milk reaches the desired temperature (around 140-150°F), turn off the steamer and give the pitcher a firm tap on the counter to burst larger bubbles. Swirl the milk gently in circular motions to evenly distribute the microbubbles, creating a shiny, silky surface. Keep the pitcher slightly tilted to achieve a smooth pour, essential for high-quality latte art. When pouring, start with a high position, then lower the spout to introduce more foam into the design, controlling the flow for sharp, clean shapes. Remember, patience during pouring prevents the sinking of your art and helps maintain microfoam integrity. I found that gently pre-heating my pitcher with hot water before steaming made the microfoam more stable, reducing bubbles and making pouring easier.
Invest in the Right Equipment
Use a quality steam wand or frother that offers fine control over steam pressure and wand depth. The best milk frothers and steamers for 2024 provide adjustable features that help prevent over-foam and bubbles. Consider a pitcher with a narrow spout for precision pouring, vital for microfoam latte art. Regularly clean your equipment to avoid residual milk fats that can cause uneven foam. I personally upgraded to a professional-grade steamer and noticed a remarkable drop in bubbles, along with a more consistent microfoam texture. Proper equipment management is crucial for achieving café-quality microfoam every time.
Practice and Observe
Microfoam perfection doesn’t happen overnight. Record your steaming sessions, noting adjustments in pressure, temperature, and pouring techniques. Repeat, refine, and compare results—much like tuning a musical instrument. Small tweaks, like adjusting the wand angle or pouring speed, can make a significant difference in bubble reduction. Over time, you’ll develop an intuitive feel for achieving smooth, velvety microfoam that holds up during latte art. Remember, consistency is key, and each practice session brings you closer to professional-level microfoam mastery, as you can explore through detailed guides like mastering microfoam tips.
Are You Falling for Latte Art Lies?
Many coffee enthusiasts and baristas alike are misled by prevalent myths about achieving perfect cappuccino microfoam and latte art. One of the most widespread misconceptions is that a higher frothing speed always results in better microfoam. In reality, aggressive frothing introduces large bubbles and can easily overheat the milk, leading to a grainy or over-aerated texture. Instead, mastering slow and controlled frothing with a quality milk frother or steamer ensures finer microbubbles and creamier results.
Furthermore, many believe that the type of milk alone seals the deal. While choosing the right milk, like specific soy or almond variations, helps, the real secret lies in proper technique and equipment calibration. An advanced mistake is relying solely on auto-steam settings, which often lead to inconsistent microfoam with bubbles or uneven texture. Mastering manual techniques or fine-tuning your steam wand can dramatically elevate your microfoam quality.
Why Do My Latte Art Designs Fall Apart?
Many get discouraged when their carefully crafted latte art dissolves quickly. The culprit isn’t always skill but often a misunderstanding of microfoam stability. A common mistake is pouring from too high above the cup, causing the microfoam to sink or dissipate faster. To avoid this, focus on pouring at the right height and speed—imagine gently gliding the foam onto the espresso. Additionally, using a wet foam with fine, uniform microbubbles enhances the stability and longevity of your latte art.
Another hidden nuance is temperature control. Overheated milk loses its microfoam integrity, leading to collapsed bubbles and broken designs. Investing in a temperature-controlled pitcher allows precise heat management, preserving the delicate microfoam structure.
What Advanced Mistakes Do Even Experts Make?
Let’s dig deeper into advanced pitfalls overlooked by most. One is the misconception that thicker milk always yields better foam. In practice, overly dense milk can hinder microbubble formation, making it difficult to obtain that silky texture. Instead, paying attention to milk temperature and using an appropriate steamer pressure and wand positioning is key.
Moreover, many professionals underestimate the importance of equipment maintenance. Dirty or misaligned steam wands and aged milk frothers limit microfoam quality. Regular cleaning and calibration are crucial, especially with high-end devices. According to expert insights, such meticulous attention to detail doesn’t just produce microfoam but sets apart an average barista from a master.
Have you ever fallen into this trap? Let me know in the comments. Improving your coffee craft is a journey of understanding nuances—small tweaks can lead to significantly better microfoam and latte art.
Investing in quality milk steamers and frothers is only half the battle; maintaining these tools is crucial to ensure consistently excellent microfoam. Regular cleaning prevents milk residue buildup that can cause uneven foaming or introduce bubbles into your microfoam, ultimately sabotaging your latte art efforts. I personally clean my steam wand and frothing pitchers after every use, using a dedicated brush and descaling agents as recommended by microfoam mastery experts. This routine upkeep preserves the fine control that allows me to produce silky microfoam every morning.
How do I maintain my steamer and frother over time?
One vital step is descaling your equipment regularly, especially if you have hard water, as mineral deposits can impair steam pressure and disrupt microfoam quality. Using a mixture of water and vinegar or a commercial descaling solution, and running it through your system at regular intervals, keeps everything functioning smoothly. Also, inspect and replace worn or damaged parts, such as rubber seals or gaskets, to prevent leaks that can affect steam consistency. Keep your steaming wand clean and free of milk build-up; even small clogs can cause sputtering or uneven microfoam. Investing in a high-quality professional-grade steamer with easy-to-access cleaning features makes this maintenance less of a chore and more of a routine to ensure long-term performance.
In the future, I see automated cleaning cycles becoming a standard feature in top-tier milk steamers, reducing user error and prolonging equipment lifespan. To get started today, try incorporating a regular descaling schedule into your maintenance routine—it’s a small step that yields big improvements in microfoam consistency and durability.
Elevate your setup with advanced tools
If you’re serious about achieving cafe-quality microfoam every morning, consider upgrading to a steamer that offers fine pressure control and easy maintenance features, like those reviewed here. Combining this with routine upkeep, including thorough cleaning and replacing worn parts, will ensure your microfoam remains silky and bubble-free for months to come. Remember, great equipment is an investment—proper maintenance sustains that investment for long-term, consistent results.

What I Wish I Knew About Microfoam When I Started
- Patience is paramount—rushing just introduces more bubbles and ruins the texture. I used to think speed was everything, but slow and steady really wins the microfoam race.
- Equipment quality and maintenance go hand-in-hand. Investing in a good steamer made my microfoam smoother, but neglecting routine cleaning caused inconsistency—lessons I learned the hard way.
- Technique trumps equipment alone. Perfecting wand positioning and pouring height transformed my coffee experience more than upgrades ever did.
- Understanding milk types matters, but mastering your tools and process matters more. Even with soy or almond milk, proper steaming techniques sealed the deal.
- Small adjustments yield big results. Tweaking pressure, temperature, or pouring angle consistently improved my microfoam and latte art quality.
My Go-To Resources for Coffee Foam Enthusiasts
- Ultimate Guide to Microfoam Mastery: The cornerstone for understanding microfoam fundamentals and advanced techniques, trusted for its clarity and depth.
- Top-rated Milk Frothers for 2024: Personal favorites that have helped me achieve cafe-quality microfoam at home.
- Mastering Milk Frother Techniques: Practical tutorials that guided me through subtle adjustments leading to silky microfoam.
- Wand Adjustment Secrets: Essential insights for controlling steam wand placement and pressure, keys to bubble-free microfoam.
Believe in Your Microfoam Journey
Creating flawless microfoam isn’t just about equipment—it’s about embracing the process, learning from tiny tweaks, and celebrating each improvement. Your perfect latte art is within reach, and every step forward brings more joy to your coffee routine. Dive into refining your technique, explore the resources I trust, and remember: consistency and patience are your best friends. Share your microfoam wins or questions below—I love hearing about your coffee journey!
I really relate to the struggle of getting rid of bubbles in microfoam. What I found most effective was controlling the steam wand’s position and reducing the pressure, which helped create those fine, even bubbles I was aiming for. I used to rush the steaming process, and that’s when larger bubbles would form, ruining my latte art. Taking my time and adjusting the wand placement made a real difference. Also, pre-heating my pitcher seems to have given me more stable microfoam. I’m curious, do others find that particular technique helps in maintaining microfoam stability, especially when pouring art? It’s a subtle detail that seems to make a big impact once you notice it. I’d love to hear what small tweaks have worked for others in improving microfoam texture and bubble control.